Synametrics Technologies
Revolving around the core of technology
Document information
| Document ID: | 1568 |
|---|---|
| Subject: | Manually creating a schedule task in Windows |
| Creation date: | 11/12/10 10:17 AM |
| Last modified on: | 11/12/18 12:25 PM |
Manually creating a backup job
Note
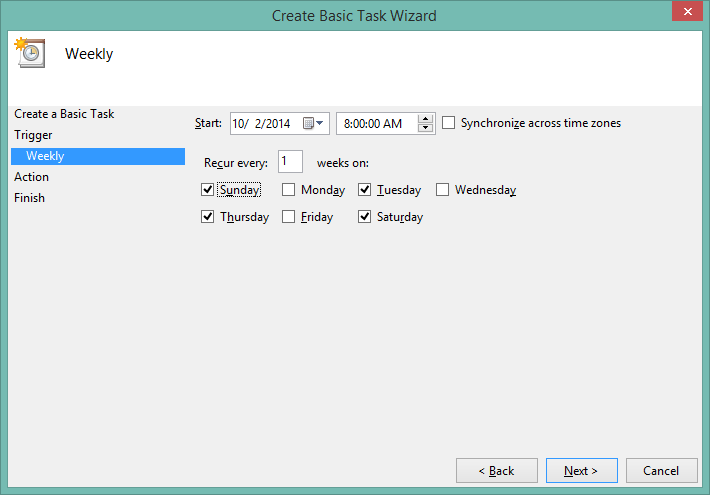
These instructions are applicable if you are using Syncrify client on Windows. Additionally, they can be used on both Service-based as well as Integrated client.Although Syncrify uses a background service to trigger backup jobs, in certain conditions you might want to create these tasks manually using the built-in Windows Task Scheduler. One such example is running backups on customized schedule. For instance you can use the following steps to run backups only on certain weekdays.
Steps to create a scheduled task manually
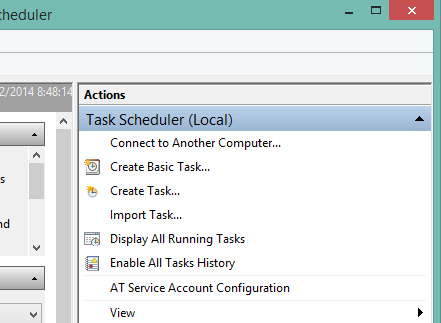
- Start Windows Scheduler. On Windows 8, search for the word "Schedule". See image below.

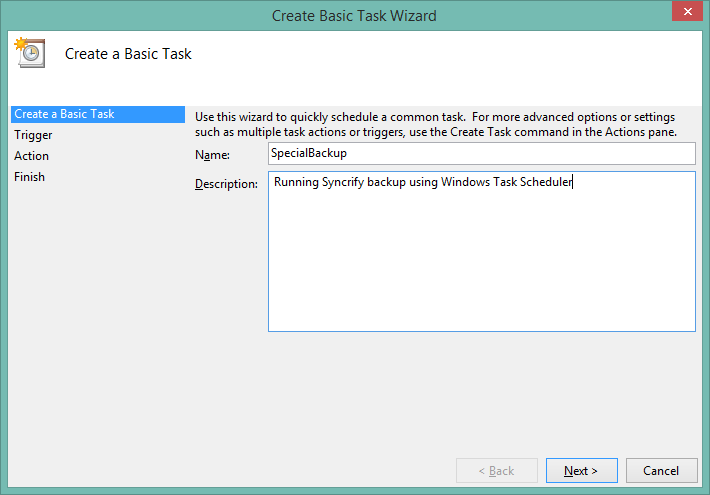
- Then, Create a Basic Task.
- Specify a name for the task and schedule for the task

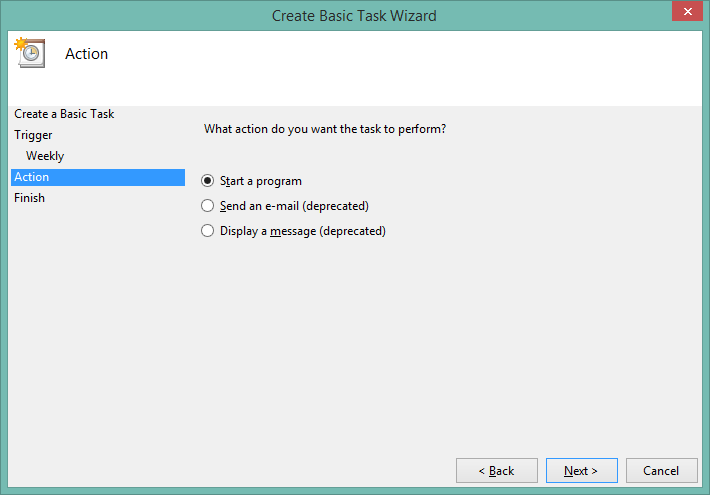
- Next, select a program to run. For convenience, click the Browse button and select the location of BackupClient.exe file

Specify the name of the profile as an argument. This value is specified as MyCloud.syncrify in the screenshot above. Ensure the name of the profile ends with.syncrify
IMPORTANT: Several variations occur for the EXE name. These are: SyncrifyClient.exe, BackupClient.exe, SyncrifyBackupClient.exe . Check the path where Syncrify Client is installed to confirm the name of the EXE file.
Syncrify Client type
The instructions mentioned above apply to both Service-based as well as integrated client. Therefore, even if you use Windows Scheduler to trigger backup jobs, it is recommended you use the service-based client, which has some additional benefits.
Add a comment to this document
Do you have a helpful tip related to this document that you'd like to share with other users?
Important: This area is reserved for useful tips. Therefore, do not post any questions here. Instead, use our public forums to post questions.
