Synametrics Technologies
Revolving around the core of technology
How to obtain a signed SSL Certificate from a CA
This guide explains how to create a certificate signing request (CSR) in SyncriTab, submit it to a certificate authority (CA), and install the signed certificate.
1. Create and download the CSR
- Sign in to SyncriTab as an administrator.
- Open Configuration, then select Configure Certificate.
- Set Certificate type to Create a certificate signing request (CSR).
- Complete the certificate request fields. Use the values that identify your organization and the hostname(s) that users will visit:
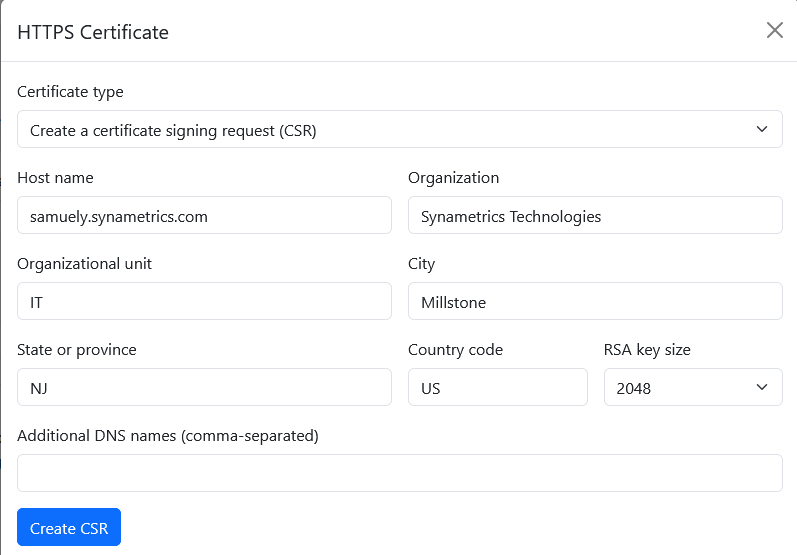
Enter the following information:
- Host name: The fully qualified domain name (FQDN) for the primary server address, such as
www.example.com. It must match the hostname users will access. - Organization: The legal or commonly recognized name of your organization.
- Organizational unit: The department or unit responsible for the certificate, if applicable.
- City: The city associated with the organization.
- State or province: The state, province, or region associated with the organization.
- Country code: The organization's two-letter ISO country code, such as
US. - RSA key size: Select an available key size that meets your organization's and CA's requirements.
- Additional DNS names: Optional comma-separated hostnames that the certificate should cover. Include every hostname clients will use.
- Select Create CSR, then select Download CSR.
- Keep the SyncriTab certificate page open: you will return back to this page to install the certificate that matches this CSR.
- Submit the CSR to the CA.
2. Submit the CSR to your certificate authority
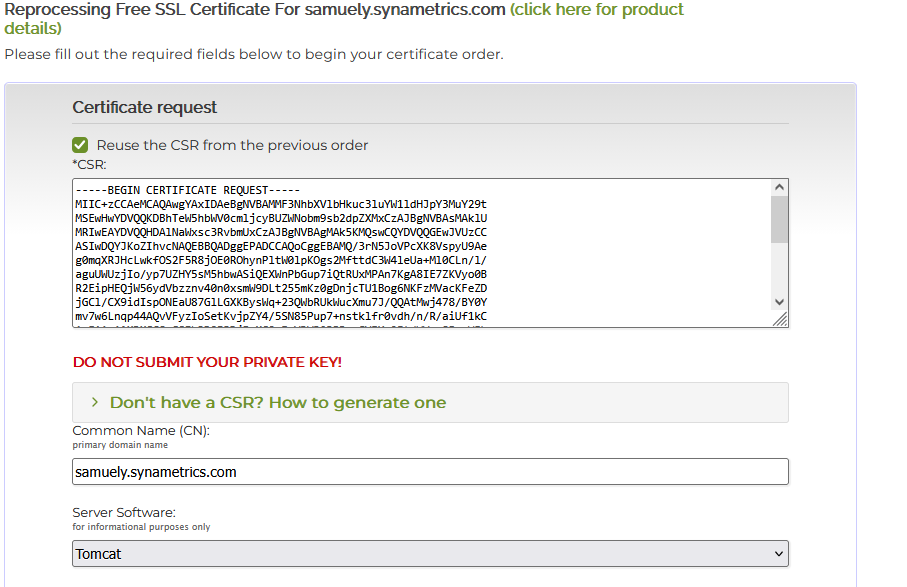
You will need to submit the CSR to a Certificate Authority (CA). In this page, SSL.com will be used as an example certificate authority (CA). The exact labels and process may differ if you use another CA.
- Sign in to your CA's website and start a new certificate order or request.
- Paste or upload the downloaded CSR into the CA's CSR field. If the CA asks for a common name, use the primary hostname from the CSR.
- Set Server Software to Tomcat, as shown in the example, and complete any validation or domain-ownership steps required by the CA.
- Submit the request and wait for the CA to issue the certificate.
3. Download the issued certificate
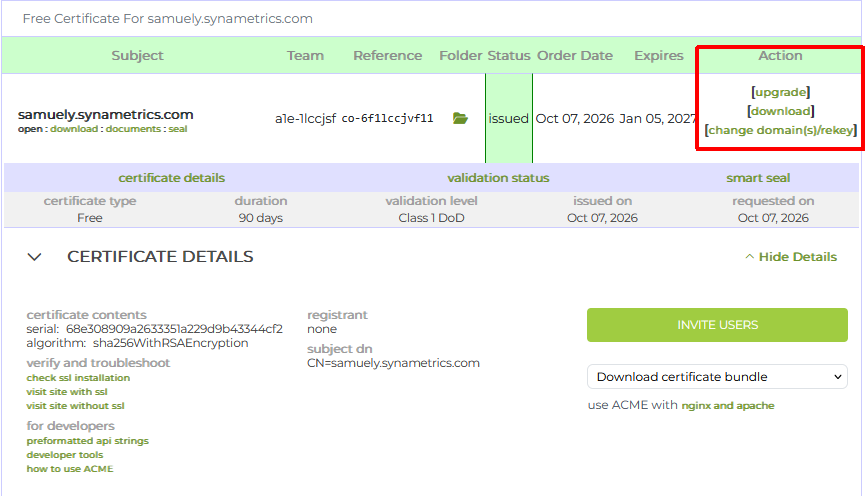
After the CA approves the request, use its download option to obtain the issued certificate.
4. Install the signed certificate in SyncriTab
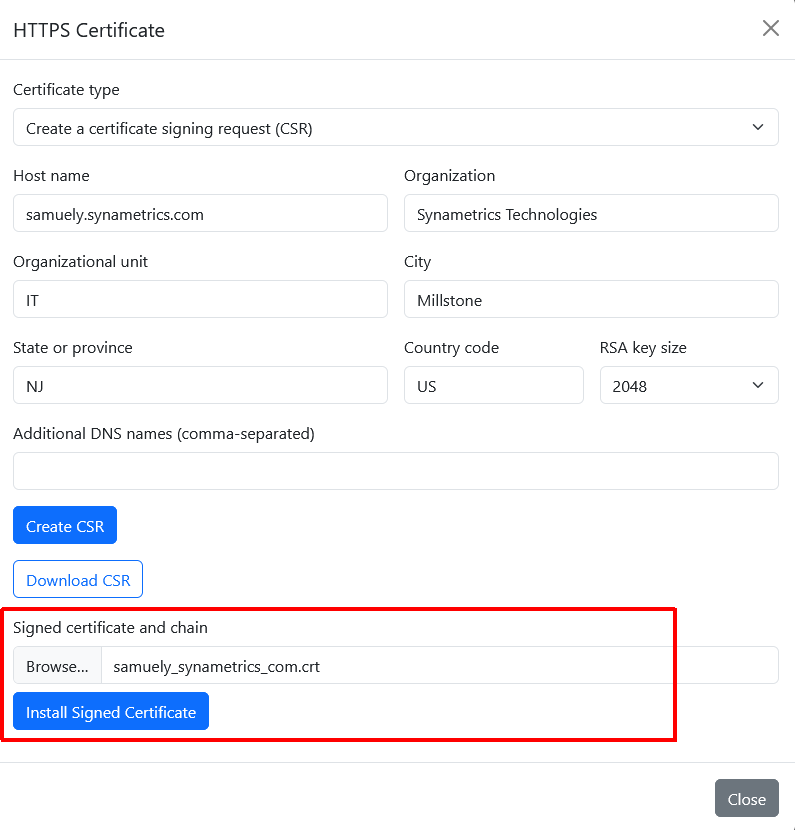
- Return to the open Configure Certificate page in SyncriTab.
- In Signed certificate and chain, browse to and select the certificate file provided by the CA.
- Select Install Signed Certificate and wait for the installation to finish.
5. Confirm the certificate is valid
After installation, check the certificate status in SyncriTab. Confirm it shows as Valid and that the hostname matches what you requested.
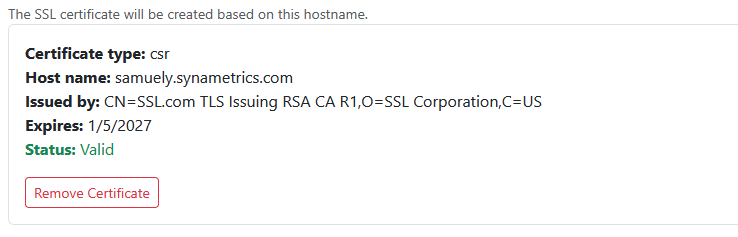
You can now access SyncriTab over HTTPS using the hostname covered by the certificate. If the browser reports a certificate warning, try clearing the browser cache. Additionally, verify the hostname and certificate status, and confirm that the correct certificate was installed.
