Synametrics Technologies
Revolving around the core of technology
Document information
| Document ID: | 1390 |
|---|---|
| Subject: | Steps for disaster recovery using Syncrify |
| Creation date: | 6/24/10 12:37 PM |
| Last modified on: | 11/12/18 12:09 PM |
Disaster recovery using Syncrify
The following steps demonstrate how to restore files from Syncrify server to a client machine that is recently rebuild from a crash.
Assumptions
- The host name of Syncrify server is backup.company.com and is listening on port 80
- The original profile name is WorkStation001
- The host name of the newly build machine is NewWorkStation
Step
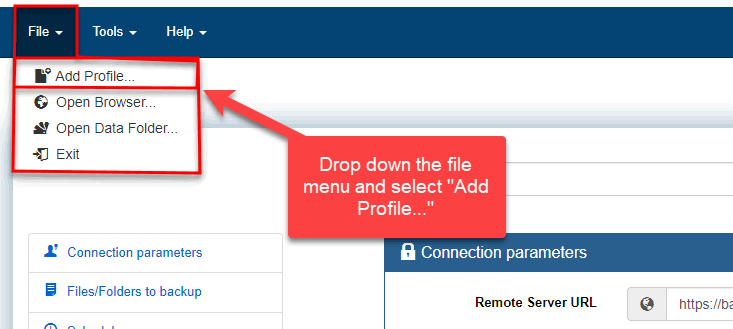
- Specify http://backup.company.com for Remote Server URL and your login email and password.
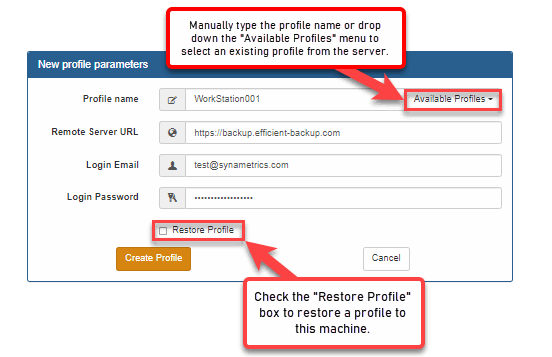
- When you first start Syncrify client on this new machine, it will automatically create a default profile called NewWorkStation. This is because the client creates a profile based on machine's host name. Since you are restoring data, create a new profile called WorkStation001

- The following screen display how to create a new profile. You can either type WorkStation001 manually, or click the search button to display a list of existing profiles associated with your user id on the server.

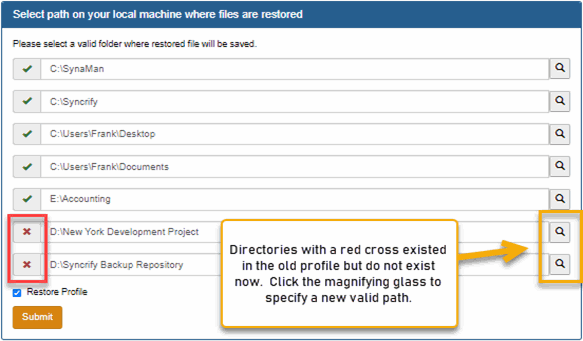
- When Restore Profile is checked, you will see the following screen.

This screen allows you to specify a different location for folders in the profile. Consider the scenario when you were using Windows XP in the past and are now moving to Windows 7. Several folders on Windows 7 have a different name. For example:
- C:\Documents and Settings\John\My Documents - Windows XP
- C:\Users\John\Documents - Windows 7
Using this screen you can specify a different location for such folders.
VERY IMPORTANT - Ensure the last folder name in the new path matches with the value in the first column. For example, if the first column says webapps, the absolute path in the second column should be C:\wwwroot\webapps and not C:\wwwroot. This ensures files are copied to the correct folder.
- Once a profile is created, either click the Restore button or click the right mouse button on the left hand side to bring up the pop-up menu and select Restore ALL files
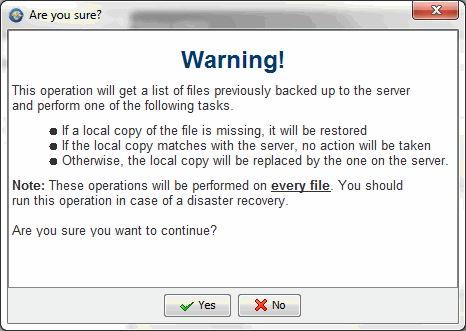
- You will get a warning message saying local files will be replaced by the version on the server. Click Yes to this question as well.

- If you specified a different location for the target files in step 4, you will see the following question pop-up.

- That should be it. Syncrify client will first download the profile information from the server and will then download files.
Add a comment to this document
Do you have a helpful tip related to this document that you'd like to share with other users?
Important: This area is reserved for useful tips. Therefore, do not post any questions here. Instead, use our public forums to post questions.
