Synametrics Technologies
Revolving around the core of technology
Document information
| Document ID: | 762 |
|---|---|
| Subject: | Connecting to MySQL using ODBC |
| Creation date: | 7/29/09 2:19 PM |
| Last modified on: | 12/13/18 12:55 PM |
Using MySQL with WinSQL
Open source databases are now being trusted to store vital data in many companies. This whitepaper talks about accessing such databases from WinSQL. Almost every open source database uses ODBC as one of primary access mechanism to the underlying data and therefore, WinSQL provides a perfect solution to access all of them using one easy-to-use tool.
This paper discusses following topics for every database
- Download and installation
- Setting up ODBC driver
- Establishing connection
- Important concepts
- Security
- Creating new database and users
- Troubleshooting
MySQL
According to EvansData, MySQL is the most popular database with over 53% market share among other open source RDBMS. The following section talks about accessing MySQL with WinSQL.
Download and installation
MySQL can be downloaded from http://www.mysql.com. This database comes in two flavors: Community Server Edition and Enterprise Edition. Community server is available for free and does not include support. On the other hand, Enterprise edition is geared toward mission critical applications backed up with full support from MySQL. The discussion below assumes that you are using the community server.
RDBS Download:? http://dev.mysql.com/downloads/mysql/5.0.html#downloads
ODBC Driver: http://dev.mysql.com/downloads/connector/odbc/5.0.html
Several installation packages are available for MySQL. Refer to http://dev.mysql.com/doc/refman/5.0/en/windows-choosing-package.html for a description of how to choose an installation package for Windows platform.
At the time of this document, MySQL ODBC connector 5.0 was available as a beta release. Initial tests with WinSQL using this driver did not show any problems. However, if you are interested in a more stable but older release, visit http://dev.mysql.com/downloads/connector/odbc/3.51.html
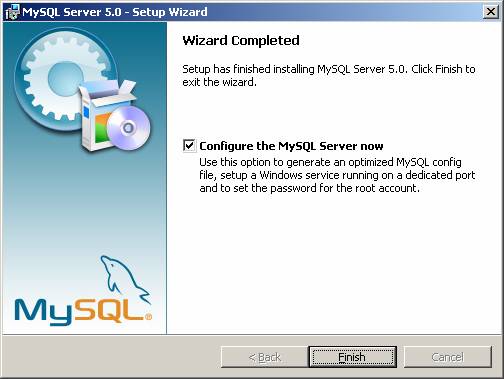
We recommend using the download package that comes with an installer. The document assumes you are installing the server on Windows. For installation on other platforms refer to the documentation that comes with MySQL. Run the installer on your machine, which will copy necessary files on to your hard disk. Towards the end of installation process, you will be prompted to configure the MySQL server.
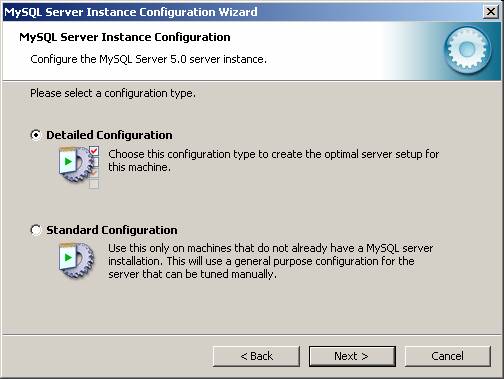
Select the detailed Configuration option in the configuration window.
Follow the instructions on the screen until you come to the TCP/IP network port.
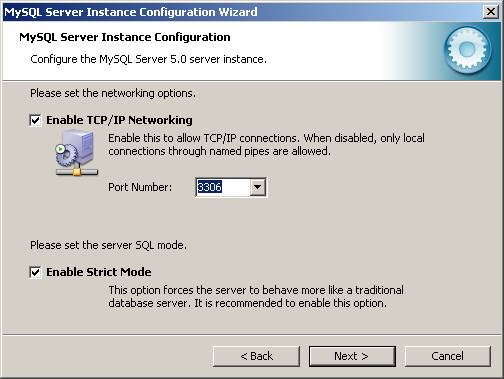
It is important to remember the value on this screen, which refers to the TCP/IP port. You will have to specify this number when creating an ODBC DSN for MySQL. The default value for this parameter is 3306 and can be changed to any number below 65000.
Another important value to remember is the password for the ?root? account. More discussion about the root account will follow in the authentication section.
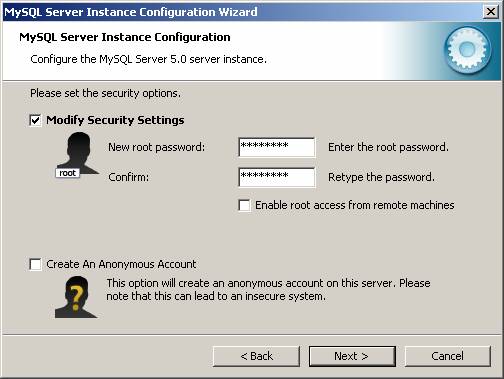
By default ?root? access is only available for the local machine. This is done for security reasons. However, if you are planning to access this database from another machine using the root access, check the ?Enable root access from remote machines?.
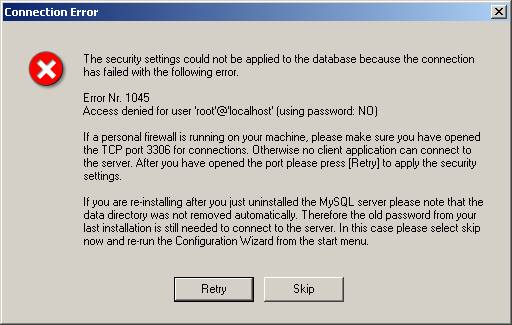
Once all information is collected, the Configuration wizard will run a set of scripts to save the values specified by the user. One important point to remember is to turn Windows Firewall off during the configuration process. This is because it may prevent MySQL service from listening on the TCP/IP port. In that case you might get the following error.
Once the database is correctly setup and installed, you can check its status from Windows Services module in Control Panel.
Installing the ODBC driver
The ODBC driver for MySQL is not bundled with the server. Therefore, you need to install that separately. The link to download this driver is shown above. All screens in the installer are self-explanatory and there are no setup options as all the installer does is to copy files and change some registry settings.
Configuring the ODBC driver
Before connecting to the database, you need to create an ODBC DSN. The steps below show how to create a DSN referring to a MySQL database running either on Windows, Linux or any other supported operating system.
- Start the ODBC manager. This can be done from within WinSQL by clicking File/Open ODBC manager, or by double clicking the Data Sources (ODBC) link in Windows Control Panel.
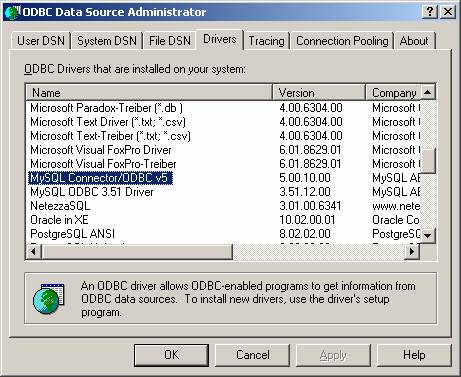
- Ensure that the MySQL ODBC driver is installed on the
machine by clicking the Drivers tab.
- Next click the either User DSN or System DSN tab to create a DSN
- To add a new data source, click the Add button and select MySQL/Connector ODBC from the list.
- Following screen is displayed, which is used to specify
connection settings.
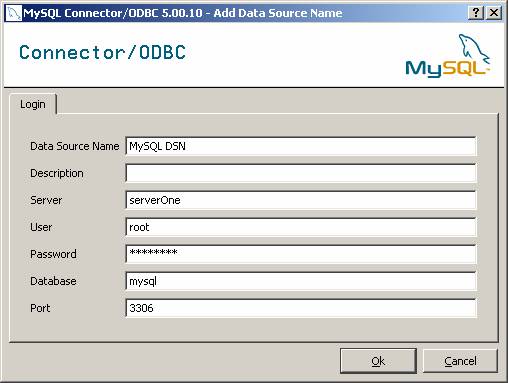
The table below describes what each parameter mean.
Data Source Name:?? A unique name identifying this data source
Description:??????????????? An friendly description
Server:??????????????????????? Host name or IP address where MySQL server is listening
User:?????????????????????????? User ID. If this is the first time, try ?root?
Password:?????????????????? This is the password for ?root?, which you specified when
??????????????????????????????????? installing the server.
Database:?????????????????? This is the name of the database. Leave this to ?mysql?
Port:??????????????????????????? Refers to TCP/IP port. Default value is 3306.
- When done click Ok
Establishing Connection from WinSQL
After creating ODBC DSN, start WinSQL. In the connection window, you will see your newly created DSN for MySQL.
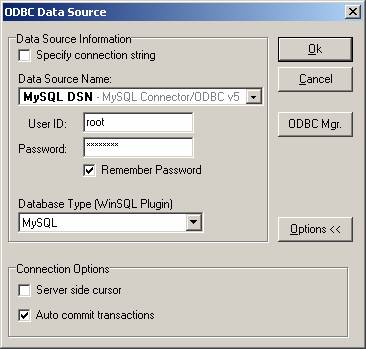
IMPORTANT: Ensure that you select MySQL as the Database type, which enables MySQL specific features in WinSQL.
Important Concepts
Default Values
Following table lists values for some important parameters in MySQL database.
TCP/IP Port:?????????????????????????? 3306
Login ID:??????????????????????????????? root
Password:?????????????????????????????? <blank>
System database name:???????? mysql
Security
As mentioned earlier, MySQL creates a user called ?root?. By default, the password is blank and client access is restricted to local machine. This default setting is modified by the Configuration Wizard that is run automatically after installation. It can also be modified later on by submitting SQL queries.
Every user in MySQL can be restricted not only by a pair of user id and password strings, but also by the host machine's IP address. Therefore, when creating a new user you have to specify the host name where this user is authorized to connect from. Wild card characters such as ?%? or ?_? can be used to specify a host as well as subnet mask. For more information about security, refer to section 5.8 in MySQL 5.0 reference manual.
New users can be created using two methods:
- Submitting a CREATE USER query
- Submitting a GRANT statement
Example 1:
??????????? CREATE USER 'scott'@'%' IDENTIFIED BY 'tiger'
??????????? CREATE USER 'scott'@'localhost' IDENTIFIED BY 'tiger'
Example 2:
GRANT ALL PRIVILEGES ON *.*? TO 'scott@%' IDENTIFIED BY 'tiger' WITH GRANT OPTION
GRANT ALL PRIVIDEGES ON *.* TO 'scott@localhost' IDENTIFIED BY 'tiger' WITH GRANT OPTION
???????????????????????????????????????????????
Both examples above create a user name 'scott', sets his password to 'tiger' and grants connection access from any machine. In addition to granting connection access, Example 2 also grants other privileges such as creating tables and modifying data. Refer to MySQL manual for more details.
Creating new database
Every instance of MySQL may have one or more database. When MySQL is first installed, it creates two databases during installation:
- mysql - stores all server specific values and global information
- test - empty database for testing purposes
It is recommended that you create another database for your needs rather than creating tables in the existing database.
Use the following SQL statement to create a new database.
CREATE DATABASE NewDbName
The name of the database is specified in the ODBC DSN and therefore, you always connect to that database. In the above example we specified ?mysql? as the database name. WinSQL displays the name of the current database in the catalog window.
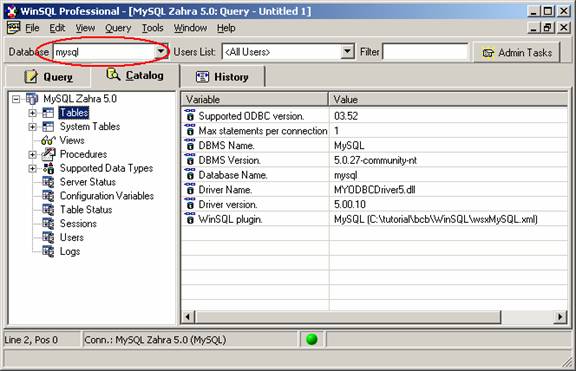
You can switch to a different database either by selecting the desired value from this pick list or issuing a ?USE? statement. For example:
USE NewDbName
Troubleshooting
The following is a list of common error messages and their solution
Message: ????? Access denied for user 'scott@192.168.1.5' (using password: YES)
Solution: ??????? No user exists with the name 'scott', password is incorrect, or the host 192.168.1.5 does not have access to the database.
Message:?????? Can't connect to MySQL server on 'hostname'
Solution:???????? Occurs when you have specified an incorrect IP address or host name in the DSN, the TCP/IP port number in the DSN settings does not match with what is configured on the server, or the server is currently not running
Message:?????? Specified driver could not be loaded due to system error 126
Solution:???????? Either MySQL ODBC driver is not installed, the necessary DLLs files are not found or the files are corrupted. Reinstall the ODBC driver to rectify the problem.
Often users run into connection problems when an appropriate user does not exist, particular when the database is installed on a remote machine.
User comments
Posted by akikarijut on 11/29/10 7:11 PM
Posted by prashat parit on 1/6/14 6:26 AM
Posted by prashant on 1/2/14 7:52 AM
Posted by mohana sai on 12/31/09 2:10 AM
Posted by sukeshni on 2/1/13 3:34 AM
Posted by ManrMan on 12/23/15 5:33 AM
Add a comment to this document
Do you have a helpful tip related to this document that you'd like to share with other users?
