Synametrics Technologies
Revolving around the core of technology
Document information
| Document ID: | 5294 |
|---|---|
| Subject: | Rename Syncrify Client Profiles |
| Creation date: | 5/9/19 1:29 PM |
| Last modified on: | 5/9/19 2:22 PM |
Renaming Existing Profiles in Syncrify Client
You can modify existing profile names within Syncrify client without needing to create a new profile or backup the data again. To do this, follow the steps below:
Client Side Changes
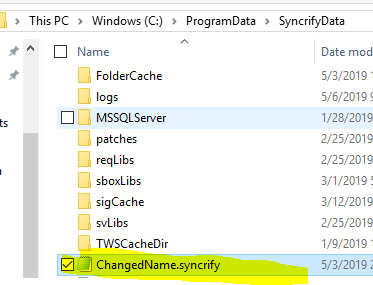
- Open the data folder of the client. The easiest way to do this is to open Syncrify Client and click FILE -> OPEN DATA FOLDER
- Look for the profileName.syncrify file at this location and edit it with a text editor such as notepad.
- Look for the parameter <profileName> and change the value between these parameters to the new profile name. Then save and close the file.
- Rename the file to newName.syncrify. Replace newName with the exact same value you used in the above step.

Server Side Changes
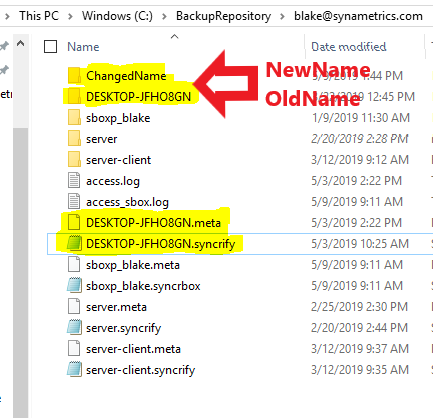
- On your Syncrify Server -- Navigate to the existing repository of this profile.
- Make a copy of the existing profile and paste it at the same location. Rename it to the exact name you used in step 3 and 4.
- In this same folder, look for the oldProfileName.meta and oldProfileName.syncrify file and rename both of them to the new name. Also, edit the oldProfileName.syncrify file here and change the name within it just as you did on the client side.
- Go back to your client and reopen it to see if the profile name has changed. If it has, run a file-diff report by right-clicking on a folder and selecting File-Diff report. If it runs smoothly then you can allow backups to run.
- After a few backups have run, you can safely delete the old profile folder on the server side.
Add a comment to this document
Do you have a helpful tip related to this document that you'd like to share with other users?
Important: This area is reserved for useful tips. Therefore, do not post any questions here. Instead, use our public forums to post questions.
