Synametrics Technologies
Revolving around the core of technology
Running Syncrify Client on Windows Server Core
Installing and configuring the Syncrify Client on Windows machines is quick and easy. However, Windows Server Core requires additional configuration due to the lack of a GUI. The steps below will guide you on installing and launching Syncrify Client on a Windows Server Core.1. Downloading and Installing Syncrify Client:
- Login as Administrator. Optionally, change the directory to the "Downloads" folder by entering the following command:
cd C:\Users\Administrator\Downloads
- Obtain the installer for Syncrify Client. For example, if you want the latest non-branded client, start Powershell by typing the command:
powershell
Then run the command below to download the client:
Invoke-WebRequest -URI https://www.synametrics.com/files/Syncrify/SyncrifyClientWinServiceVM64.zip -OutFile SyncrifyClientWinServiceVM64.zip
The command above will download the latest client installer for Windows 64 bit.
Note: if you have a branded client, you will need to transfer the branded client installer to the Windows Core machine. - Once the installer has finished downloading, extract it by running the following command in powershell:
Expand-Archive SyncrifyClientWinServiceVM64.zip
- You should now see a SyncrifyClientWinServiceVM64 directory. Go to this directory. If you run the
DIRcommand, you should now see a file calledsetup.exe.
- Run the following command to start the setup:
.\setup.exe
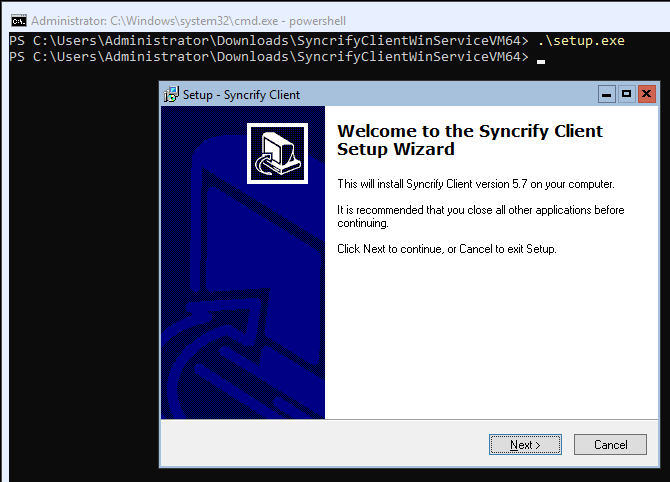
You should now see the Syncrify Client installer pop up as shown below:
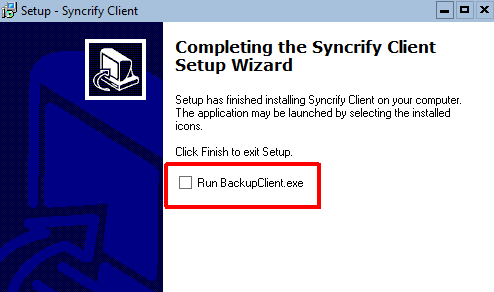
Proceed with the setup wizard to install Syncrify Client. - At the last part of the installer, uncheck the option "Run BackupClient.exe" then click on Finish as shown below:

2. Opening Syncrify Client Web-GUI
- Go to the directory where Syncrify Client is installed. By default, this directory is in
C:\Program Files\SyncrifyBackupClient
- To start the web client GUI, enter the following command:
& "C:\Program Files\SyncrifyBackupClient\jre\bin\java" -jar Loader.jar -httpPort 12345
The above command will run the client web GUI on port 12345. If you wish to use a different port, change the port number. - The command will output information and will let you know if the client web GUI has been started:

- The web GUI will not open on this machine. Therefore, you will need to access the client GUI on a separate machine. For example, if the machine where Syncrify client is running's IP address is 10.11.12.134, enter the following on another local machine's web browser:
http://10.11.12.134:12345
- If the Web GUI is not able to connect from another machine, you will need to make sure the port is enabled. On the machine where Syncrify Client is running, to enable port 12345, enter the following command in PowerShell:
New-NetFirewallRule -DisplayName 'Syncrify Web Client' -Direction Inbound -Action Allow -Protocol TCP -LocalPort 12345
- Please note the web GUI client will terminate after 30 minutes of inactivity. You will need to run the command again in order for the web GUI to start once more.
Troubleshooting
Please check the following if the web client GUI is not opening:- Ensure the port is not blocked by the firewall on the network.
- Confirm there are no errors when running the command to start the web GUI. Syncrify client logs are located in
C:\ProgramData\SyncrifyData\logsdirectory.
