Synametrics Technologies
Revolving around the core of technology
Document information
| Document ID: | 1303 |
|---|---|
| Subject: | Using SynaMan with Microsoft IIS server |
| Creation date: | 5/4/10 5:31 PM |
| Last modified on: | 11/8/18 11:14 AM |
Using SynaMan with IIS
Often users have an existing IIS server installed in their network and want to use it as the front end to SynaMan's built-in web server. This article provides steps by steps instructions on how to accomplish this task.When SynaMan is used in this manner, clients connect to your IIS server, which routes the request to SynaMan using an ISAPI extension. Clients get an impression that they are connecting to your normal web server.
Assumptions
The following assumptions are made in document.- You have installed SynaMan on the same machine where IIS is running
- Your domain name is myCompany.com
- SynaMan is installed in
C:\SynaManfolder.
Steps
- First, download necessary files here.
- Create a sub folder under
C:\SynaMancalledIISConnector - Unzip the downloaded file and extract all files to c:\SynaMan\IISConnector
- Stop SynaMan if it is running.
- Download ajp.jar from here and save this file in the C:\SynaMan\lib folder.
IMPORTANT: The extension of this file is .JAR. Often Internet Explorer changes the file extension to .zip. If this happens, make sure to change it back to .jar. The file name in the lib folder should be ajp.jar. -
Next, using any text editor modify C:\SynaMan\config\AppConfig.xml file. Add the following line in this file towards the top.
<parameter name="ajpEnabled" type="4" value="true"></parameter>Refer to the image below.

- Start SynaMan's service
Test 1
Perform the following test before proceeding to the next step.- Using a console (DOS) window type the following command:
telnet localhost 6061 - You should see a blank screen if everything is fine. Close the DOS window to disconnect. If you get a message that says "Could not open connection to the host", this means the test failed. Ensure you have correctly completed all the steps above. This test MUST pass before you proceed.
Configuring IIS
- Start the IIS Manager. The following screen shots are taken on Windows 2003 running IIS 6.0. Your screens may look different if you are running a different version.
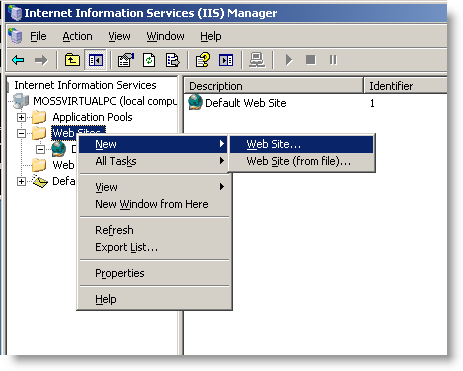
- Create a new web site, by clicking the right mouse button and selecting New / Web Site...
- This brings up the following screen.

- Click Next
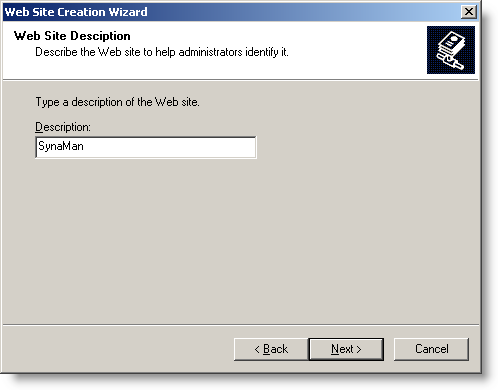
Type SynaMan in the description field and click Next.
-
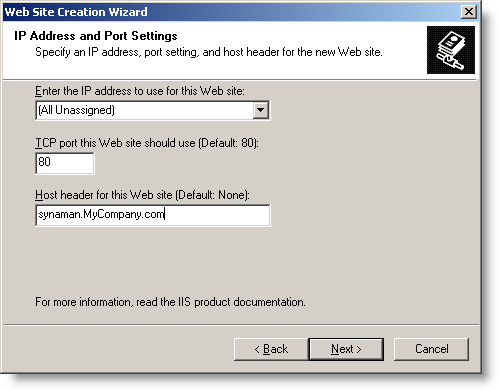
On the following screen type a host header. This is used by IIS to properly route messages to SynaMan, rather than
processing itself.
In this example, I used:
synaman.MyCompany.com
Replace "MyCompany.com" with your actual domain name.
-
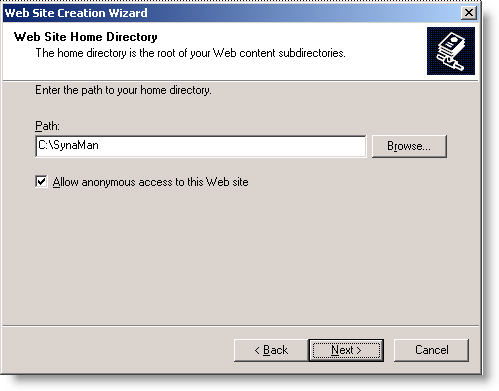
Click Next to bring up the following screen.
For the Path field, select the installation directory for SynaMan. In this case, it is C:\SynaMan. Ensure Allow anonymous access to this Web site is selected.
-
Click Next.
Check Execute (such as ISAPI applications or CGI) and click next.
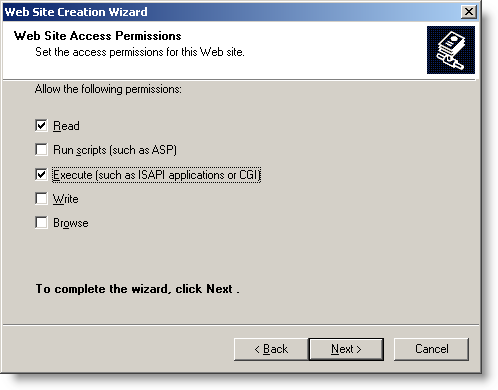
-
Finally, click Finish

-
When done, you should see your newly created web site in IIS manager.
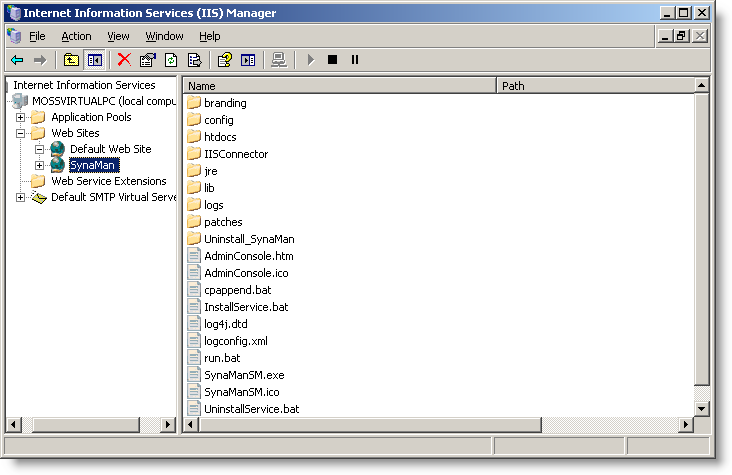
-
Next, right click on the newly created web site and select Properties from the pop-up menu.
Click on the ISAPI Filters tab.
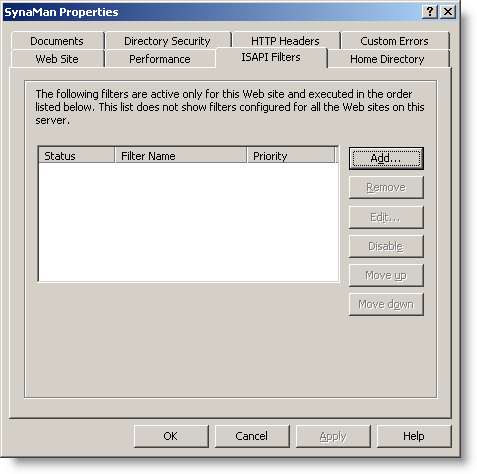
- Click the "Add" button on the screen to add a new filter.
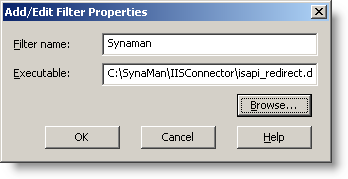
Put "Synaman" as the filter name. For Executable select C:\SynaMan\IISConnector\isapi_redirect.dll
Click Ok.
Click Ok again to close the Properties Windows.
- Next, right mouse click on the "Web Service Extension" and select "Add a new Web server extension...".
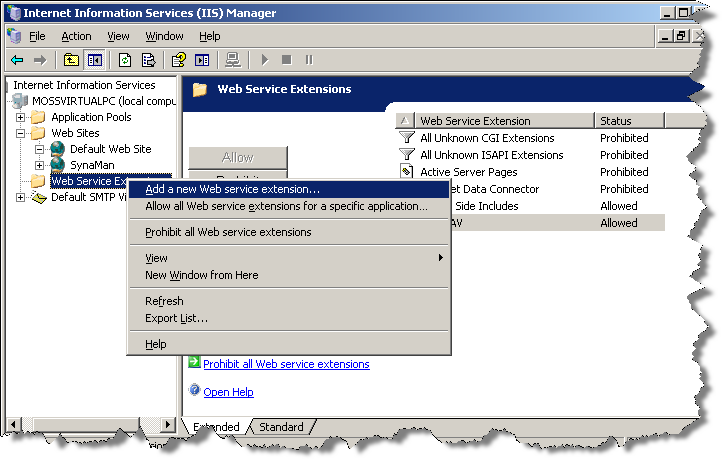
- This brings up the following screen.
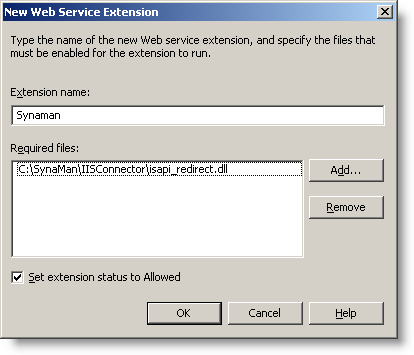
Put Synaman as the "Extension name".
Click the Add button and select isapi_redirect.dll as the file name.
Check Set extension status to Allowed
Click Ok.
- You should be back to the main screen.
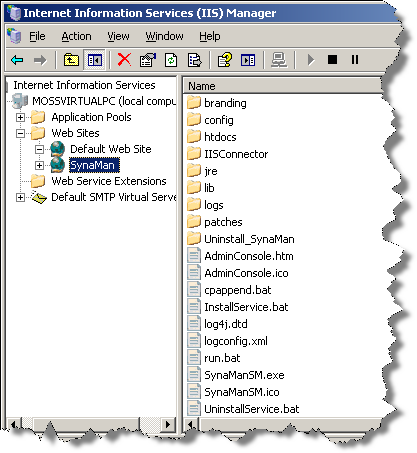
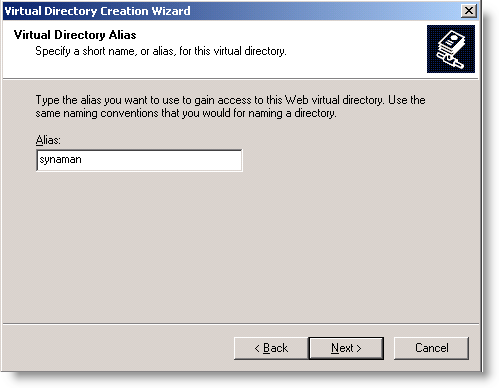
- Next, create a new Virtual Directory with the SynaMan web site.
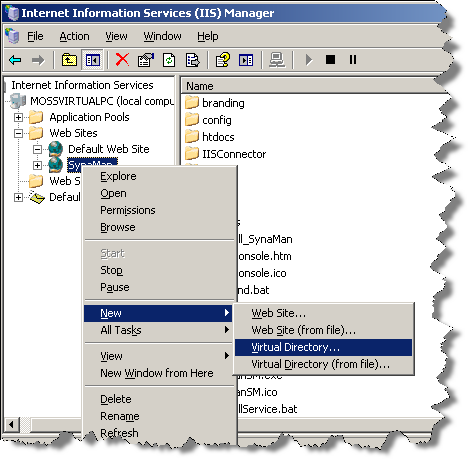
- This brings up the following screen.

- Type synaman (Lower case) for its Alias
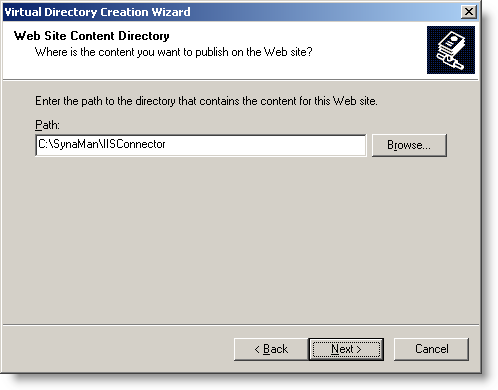
- Select C:\SynaMan\IISConnector for its path
-
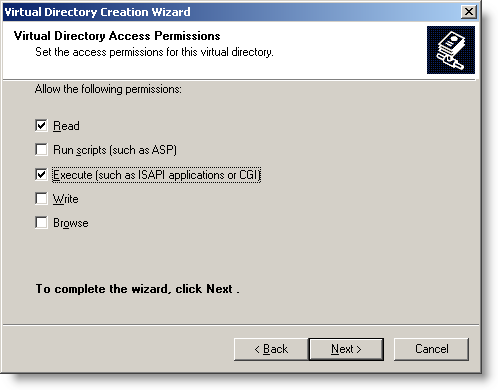
Check Read and Execute (such as ISAPI applications or CGI)
-
Finally Click "Finish"

-
Restart SynaMan Web site by clicking the Stop and then the Play button
That is it. Now you should be able to type:
http://synaman.myCompany.com in your browser to bring up SynaMan.
Add a comment to this document
Do you have a helpful tip related to this document that you'd like to share with other users?
Important: This area is reserved for useful tips. Therefore, do not post any questions here. Instead, use our public forums to post questions.
