Synametrics Technologies
Revolving around the core of technology
SynaMan on AWS Marketplace
SynaMan is available on AWS Marketplace, which offers several benefits:- Easy deployment: AWS Marketplace makes it easy to find, purchase, and deploy software applications on your AWS infrastructure, with just a few clicks.
- Flexible pricing: AWS Marketplace offers flexible pricing options, including hourly, monthly, and annual subscription models, which can help you save on software costs.
- Secure and reliable: All software applications available on AWS Marketplace are vetted for security and reliability, and are backed by AWS's secure infrastructure.
- Automatic updates: Many software applications on AWS Marketplace are configured to automatically receive updates, so you can be sure you are always using the latest version.
- Integrated billing: AWS Marketplace offers integrated billing for all software applications, so you can easily track and manage your software costs alongside your other AWS services.
Getting Started with SynaMan on AWS
Once you subscribe/purchase SynaMan on AWS, you can now launch an instance, a VM with SynaMan already installed on it. To launch the instance, follow the instructions below.1. Launching an instance from SynaMan AMI
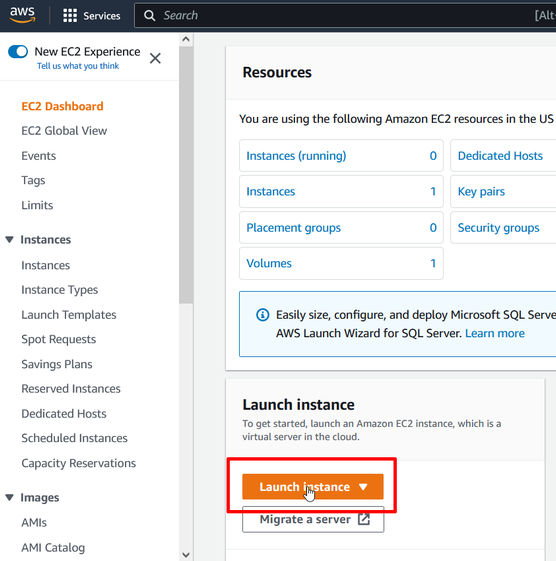
To start, access your EC2 dashboard. Click on Launch Instance as shown below:
You can also click on Instances on the left menu, then click on Launch instance.
You will now see a launch instance wizard. Here, you will need to specify multiple options:
- Name: specify any name here.
- AMI: select the SynaMan AMI
- Instance Type: Select the instance type for SynaMan. We recommend selecting t2.medium.
- Keypair: Keypair is used to access the machine (SSH) where SynaMan is running. Specify a key pair that you use here (if not, create a key pair). See here for more information about key pairs.
- Network settings: By default, ports 22, 80, 443, and 6060 should be open. In not, configure these ports to be available.
- Configure storage: By default, 30 GB is set. Increase this value higher if you need additional disk space.
Once configured, you will see a summary at the bottom. Confirm the settings are correct, then click on Launch instance. You will see your instance in the instances page as shown below:

2. Accessing SynaMan Interface from the Instance
Once the instance is running, you can now access the web interface of SynaMan. You can access it by entering the public IP address in your address bar, or by entering the hostname. If you click the checkbox next to the instance on the instance page, this will bring up the instance detail. In the detail tab, you can also click on "open address" next to the address/hostname: You should now see the initial setup for SynaMan. Follow the instructions on the interface to complete your setup.
Other Questions
How do I configure static IP for my Instance?
By default, the IP address for your instance is a dynamic IP that will change if you stop the instance. If you want to have a static IP, you will need to configure an elastic IP address. Please see AWS's documentation here for more details.
