Synametrics Technologies
Revolving around the core of technology
Integrating SynaMan with Azure AD
Azure AD (Active Directory) is Microsoft's multi-tenant, cloud-based Identity server, which organizations can use to provide a single sign-on mechanism. Administrators can integrate SynaMan with Azure AD to provide a single authentication method used by other applications in their organization.
Important Information Before Proceeding
- Users can only log in using Azure AD credentials once this feature is enabled. Local users in SynaMan or users associated with a local LDAP server will not be able to connect once this single sign-on is enabled.
- Ensure every user in Azure AD has a valid email address associated with their account. Failure to have a valid email address will create a user with their Object ID, which will appear as gibberish when managing users.
Preparing SynaMan for Azure AD
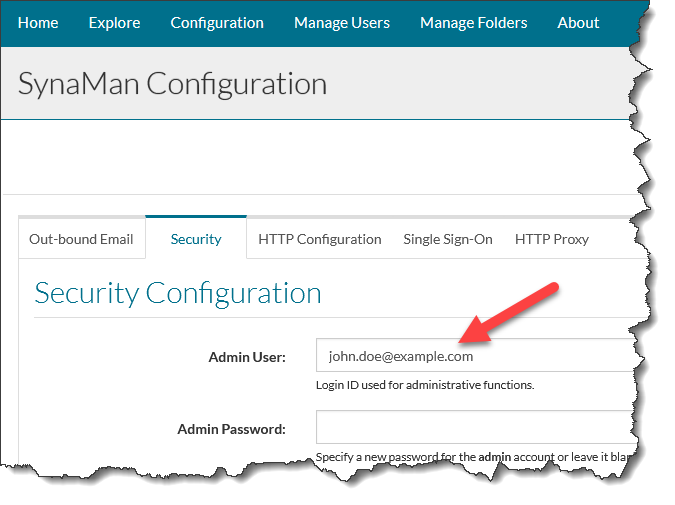
Since you will no longer be able to log in as local users, assigning an existing user in Azure AD as the administrator in SynaMan is essential. Follow the steps below to accomplish this task.
- Log in as admin
- Click Configuration
- Select the Security tab
- Modify the value for the Admin User field to an existing user in Azure AD. For this example, let's assume that the user is john.doe@example.com. See the image below for reference.
Preparing Azure AD
You will need to take a few steps on the Azure portal before configuring SynaMan. These steps are described in detail on Microsoft's Azure help portal and are summarized below.
- Create a Tenant
- Register SynaMan as a web app
- Copy endpoint URLs
- Create a Client Secret
- Configuring users in Azure AD
Create a Tenant
The word Tenant is often referred as Realm in other OAuth servers, and is required to isolate users within an organization. A Tenant must be created before using an application. The following steps demonstrate how to create a tenant.
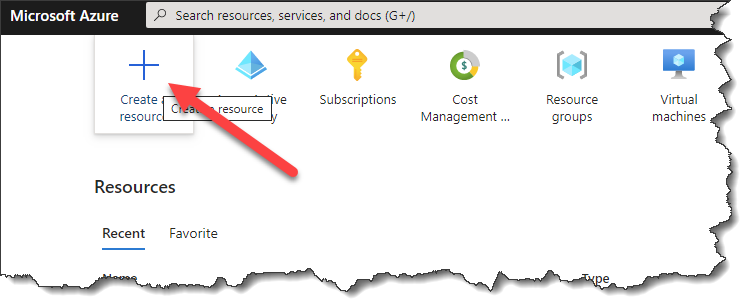
- Log in to your Azure portal
- Create a new resource
- Click Identity on the left
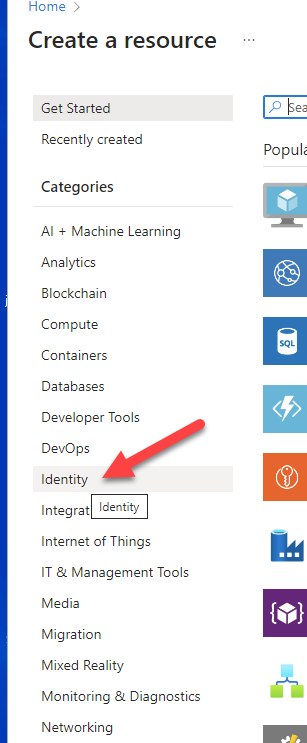
- Click Create under Azure Active Directory

- Select Azure Active Directory on the Create a Tenant page and click Next

- Next, assign a name for your tenant
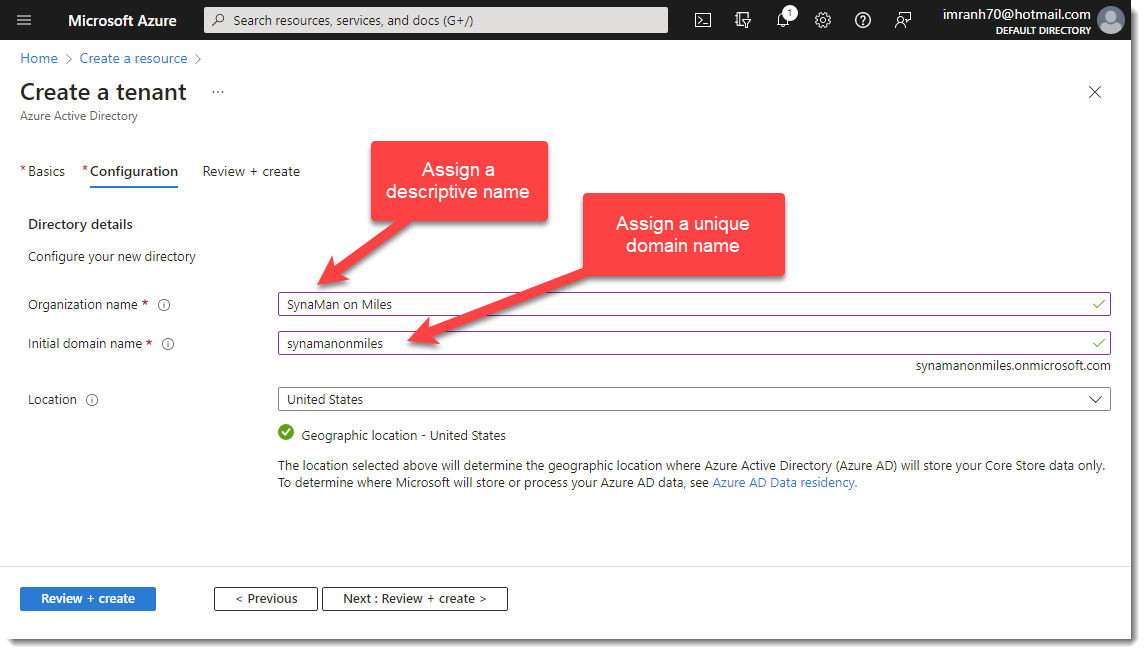
- A tenant will be created when you click next
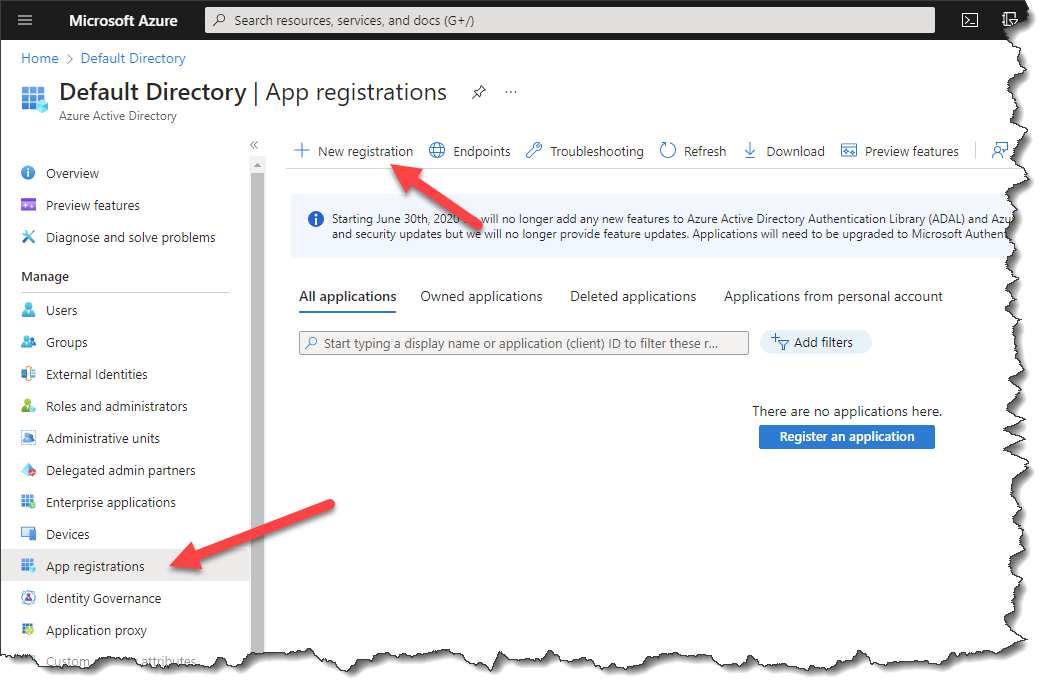
Register SynaMan as a web app
- Click App registrations from the left panel and click New registration
- Use the following values to register an app
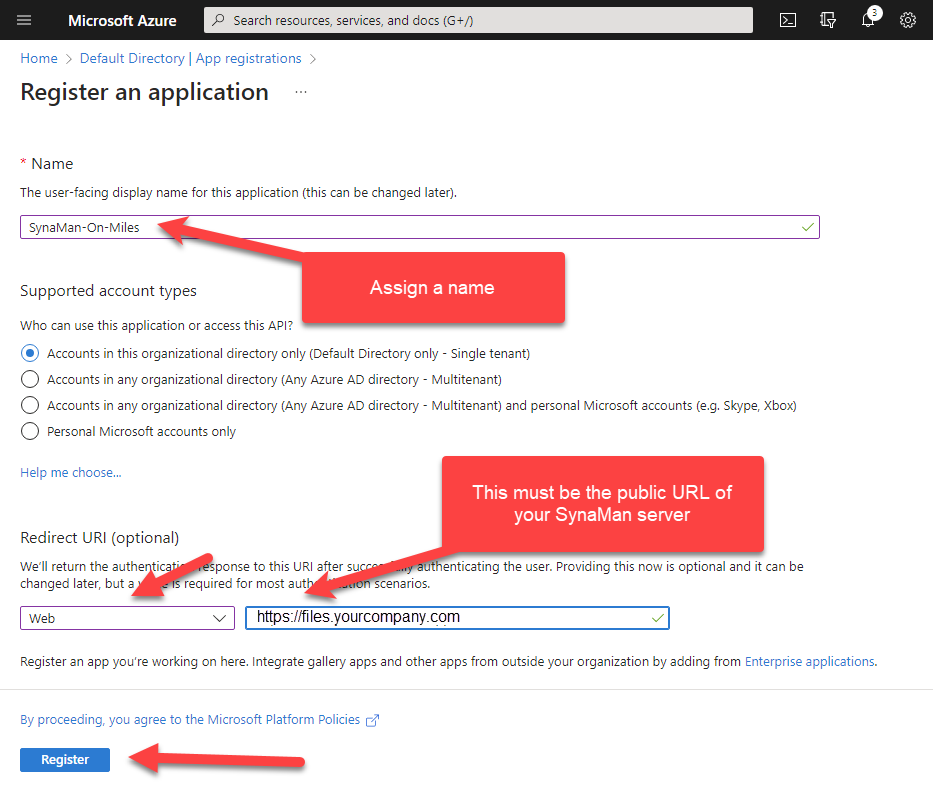
- VERY IMPORTANT: You must specify a URL for your public facing SynaMan server. If you have a URL that is only available from your LAN, enter that value. You will be able to enter additional URLs after registration is complete. Failure to add a URL in this location will result in error preventing users from logging in.
Copy endpoint URLs
- Next, select the newly create Tenant.
- Open a text document. You will need to copy/paste a few values that will be required in the next steps
- First, copy the value of your Application (client) ID
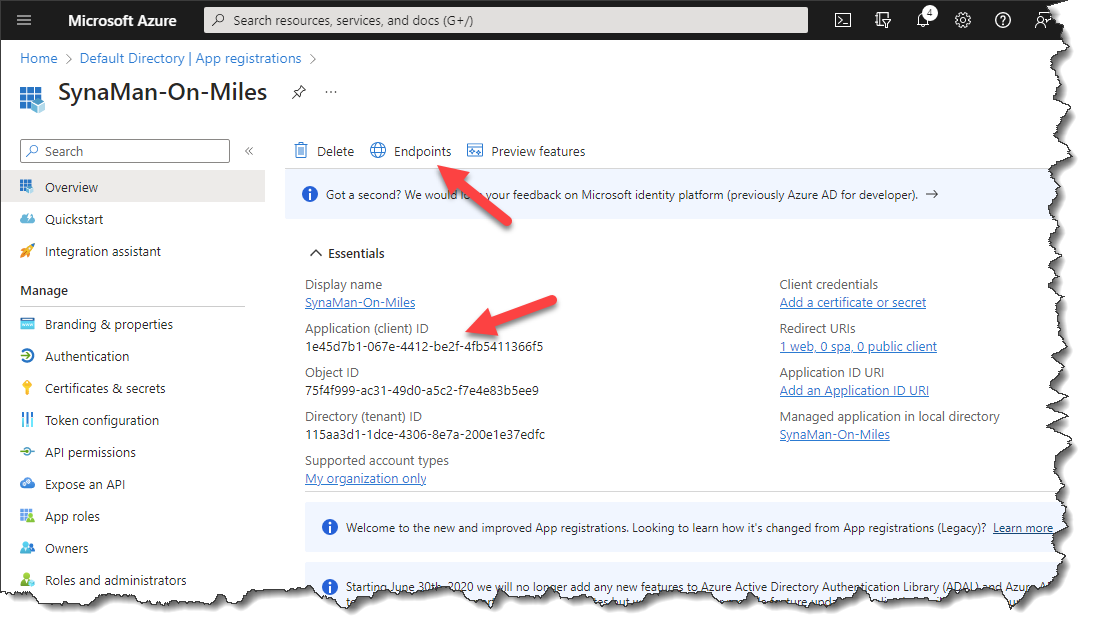
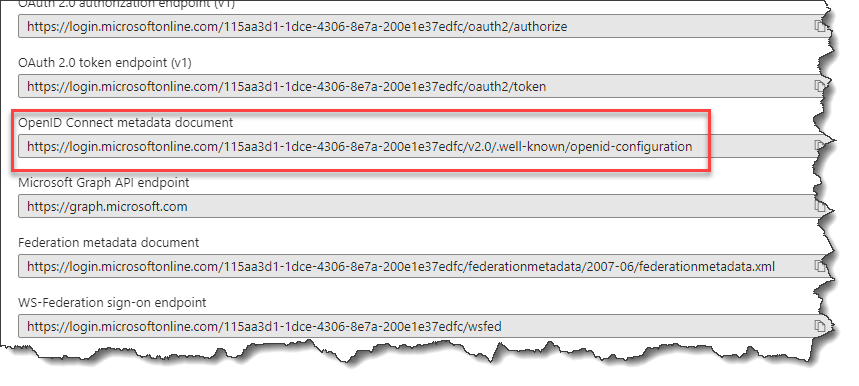
- Next, click on the link for Endpoints and copy the URL for OpenID Connect metadata document, as show below
Create a Client Secret
- Click Add a certificate or secret under Client credentials as shown below

- Select the tab for Client secrets and click New client secret as shown below
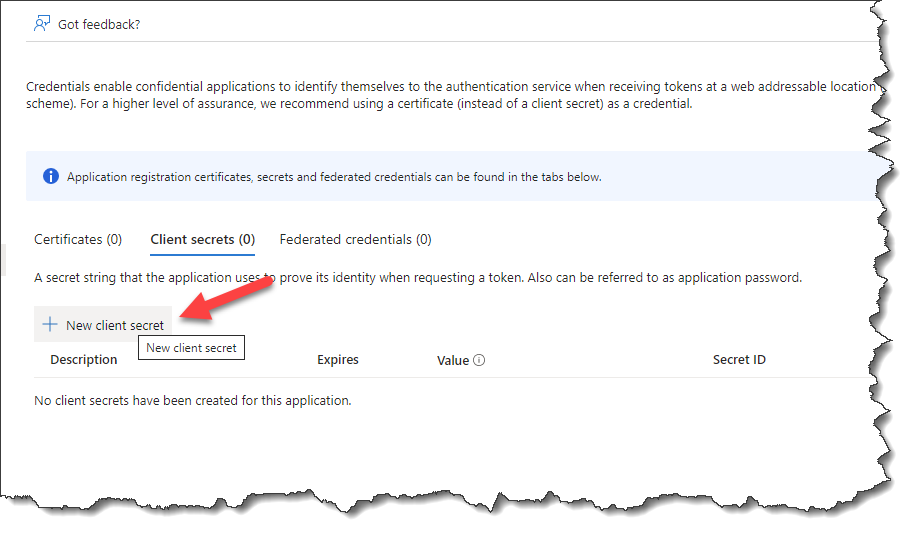
- Add a description and assign an expiration date. You will have to recreate the secret once it is expired.
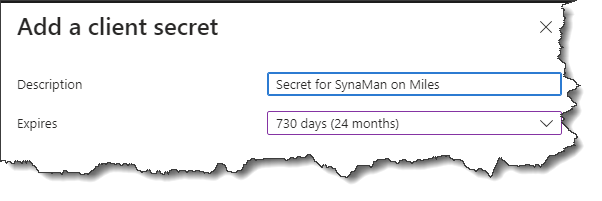
- Copy/paste the value for this newly created Client secret in the document you created in earlier step. You will need this when configuring SynaMan.
Configuring Users in Azure AD
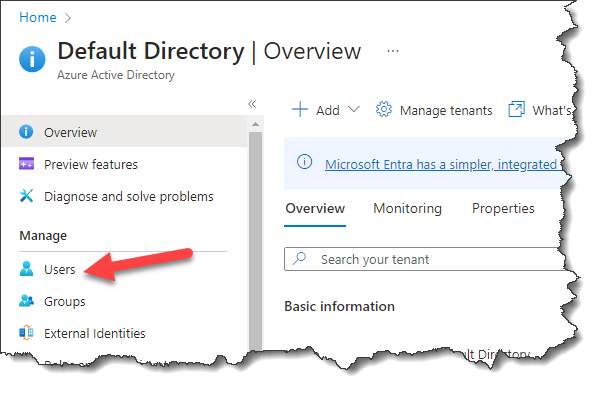
- Click the resource for Azure Active Directory and select Users from the left panel as shown below
- Click an existing user and select Properties
- Ensure a value exists for the Email field as shown below
Failure to specify an email address will cause the object ID of the user as the user name, which is not very user friendly. - Repeat the process for every user
Configuring SynaMan
By this time you should have three values in the text document you created earlier:
- Endpoint URL for OpenID Connect metadata document
- Client ID
- Client secret
Next, log in to SynaMan's web interface and click Configuration and select the tab for Single Sign-On.
Paste the three values from your document into the fields below. The Endpoint URL will go in Auth Server Metadata URL as shown below.
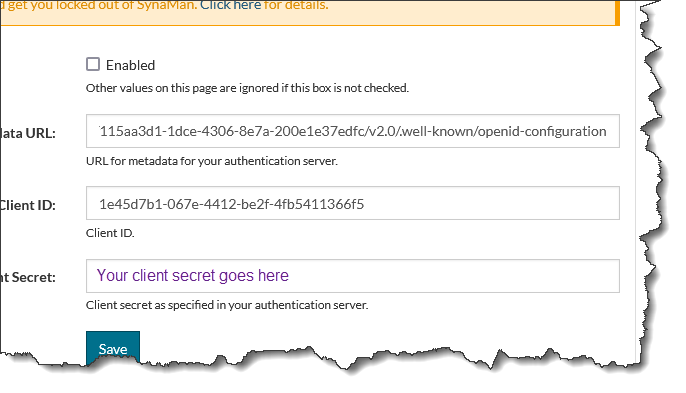 . Finally, click Enabled and hit the Save button.
VERY IMPORTANT: Do NOT close this browser window. You may need it later on in case you need to rollback.
Testing Connectivity
To test, open another browser window either in Incognito mode and try connecting to SynaMan. Rather than seeing the standard log in window in SynaMan, you should see a login screen from Microsoft.
Try logging in completely. If you run into any problems, disable Single Sign-On from the other browser and look at
SynaMan.log file in $INSTALL_DIR\logs for errors.
Temporarily Disabling SSO
Once Single Sign-On is enabled, the built-in login screen in SynaMan gets replaced by the login screen of your identity server, or Microsoft login page in this case. Therefore, there is a possibility of getting locked out of SynaMan in case of an error. Use the following method to bypass SSO in case you need to access the web interface without SSO.
- The following method will only work when connecting from localhost. In other words, the URL in your browser should be
something like
http://localhost:6060 - Manually change the URL in the address bar to
http://localhost:6060/app?skipSSO=1 - This URL will display SynaMan's login page instead.
