Synametrics Technologies
Revolving around the core of technology
Connecting to Amazon Redshift with ODBC
Benefits
Using an ODBC connection to Amazon Redshift will greatly enhance your ability to work with the database. By doing this, you add a multitude of features, but most importantly, you make querying the database a much easier task. Additionally, you could use several third-party reporting and querying tools that are otherwise not available.
In this article we are going to cover how to connect to Amazon Redshift through ODBC. The tool used in the article will be WinSQL, a powerful SQL query software with additional features.
Connecting to Redshift
First, you will need to enable outside connection to your Redshift instance so that WinSQL can connect.
Step 1: Enable Public Accessibility
To do this, go to your AWS management console. Find the cluster that is running your redshift database, and click PROPERTIES.
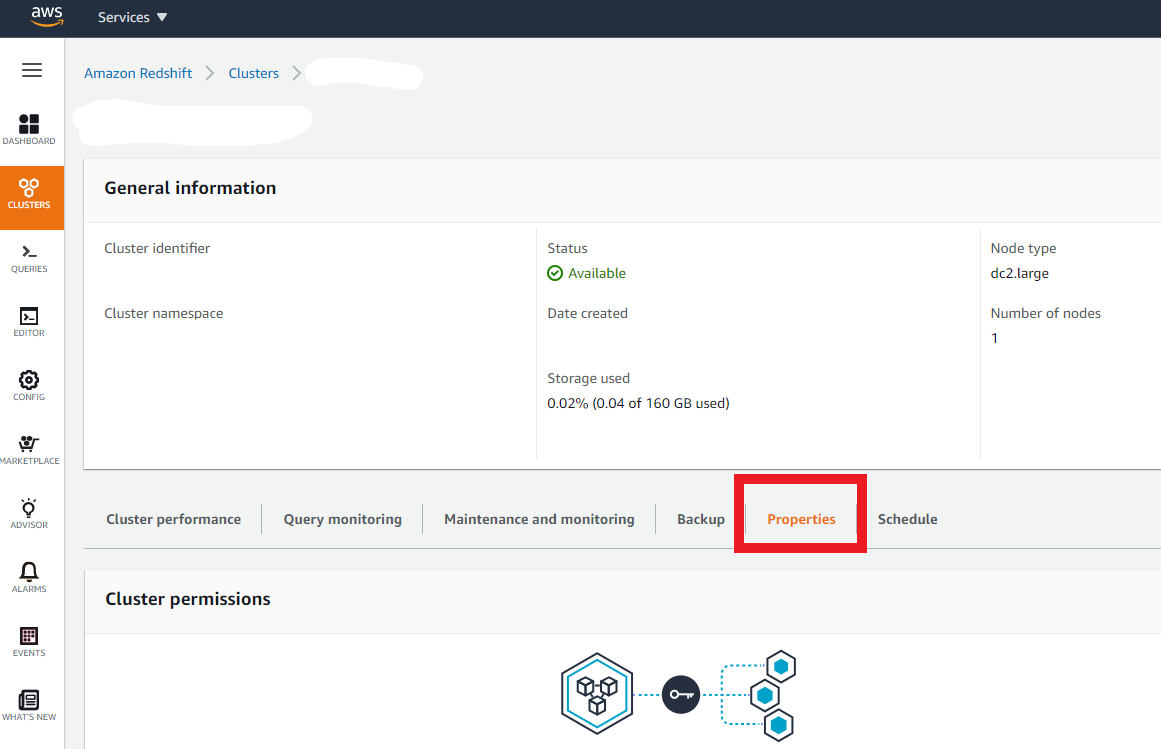
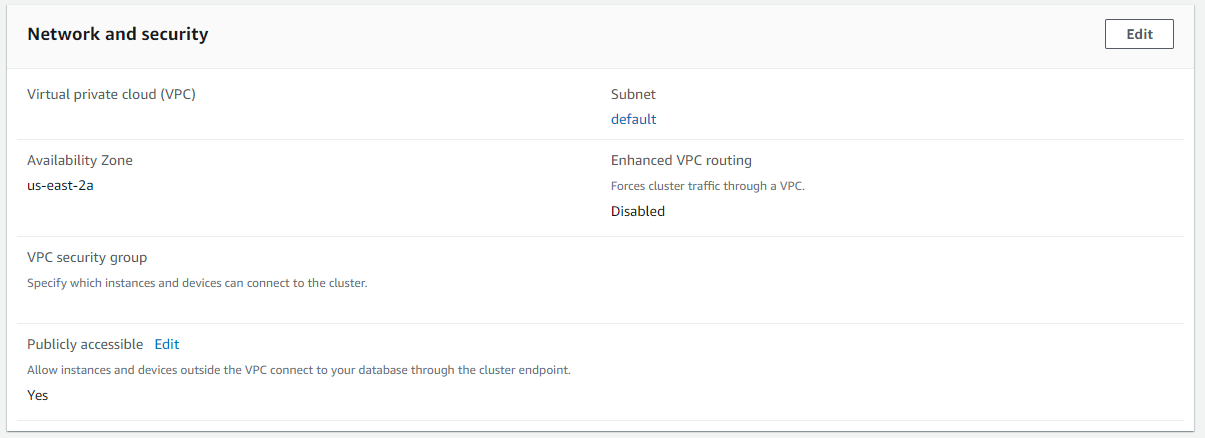
On the Properties tab, scroll down to the Network and Security section and edit the Publicly Accessible status to Yes.
Step 2: Obtain your ODBC Connection String
The easiest way to do this is to copy your endpoint to a notepad. Your endpoint will be under "General Information" at the top of your "Properties" page that you are on from Step 1 above.
The endpoint will provide you with the something similar to following:
YourCluster.us-east-2.redshift.amazonaws.com:####/dbName
Note: YourCluster will be the name of your cluster. The port will be the port your Redshift is listening on, and the dbName will be the name of the Database you are connecting to.
Step 3: Download the Redshift ODBC Drivers
Download the driver for your System from Amazon's page here: Amazon Redshift Configure ODBC
Step 4: Configure the Connection in WinSQL
- Open WinSQL and open the ODBC Manager.
- Click on the "User DSN" tab.
- Click "Add".
- Select your Amazon Redshift ODBC Driver.
You will need to fill out the following fields:

| Field | Description |
|---|---|
| Data Source Name | This is a friendly name you want to apply to this Data Source. |
| Server | This is copied directly from your endpoint. Copy everything up to the port number: YourCluster.us-east-2.redshift.amazonaws.com |
| Port | This is also copied directly from your endpoint, it is the Number directly after your server above. YourCluster.us-east-2.redshift.amazonaws.com:####. |
| Database | Database: This is also copied directly from your endpoint and follows the port number, and is typically the last thing in the endpoint string. YourCluster.us-east-2.redshift.amazonaws.com:####/dbName |
Next we need to configure the Authentication. There are multiple ways of Authenticating to your Redshift Database such as Standard Auth, AWS Profiles and AWS IAM Credentials. It is up to your database administrator to determine which set of credentials is necessary for you. Once you specify your credentials, click the "Test" button at the bottom. If there are no issues, you should see a "Success" message.
For any additional questions on connecting via ODBC drivers, as well as additional options, checkout Amazon's page here: Amazon ODBC Connection Guide.
Running Queries and Interacting with Amazon Redshift
Now that we are successfully connected, we can begin running queries and modifying the database.
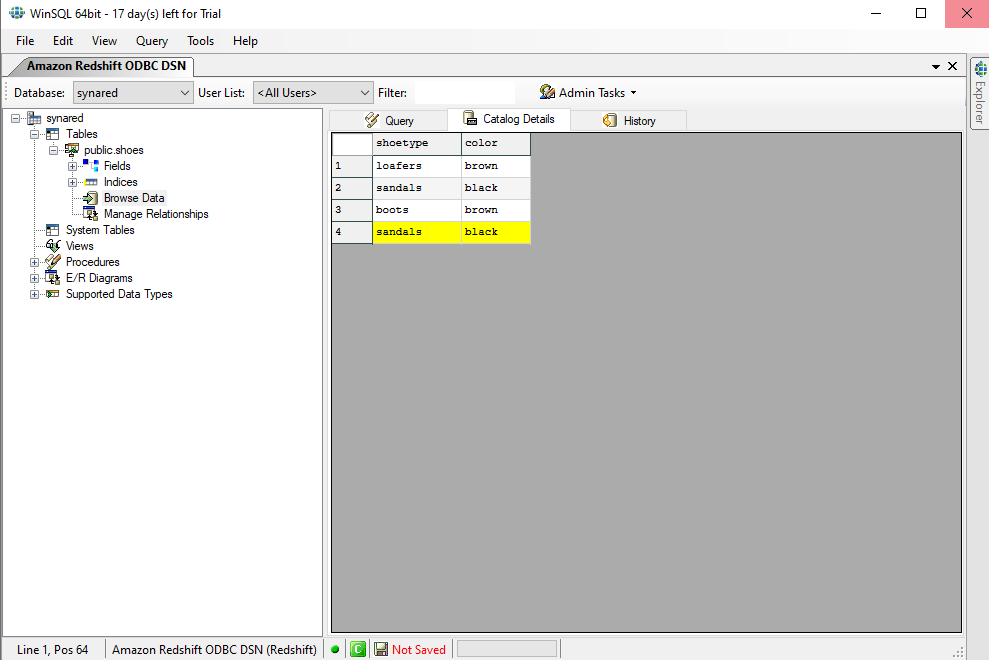
In this example, I am adding a new shoe to my shoes database:
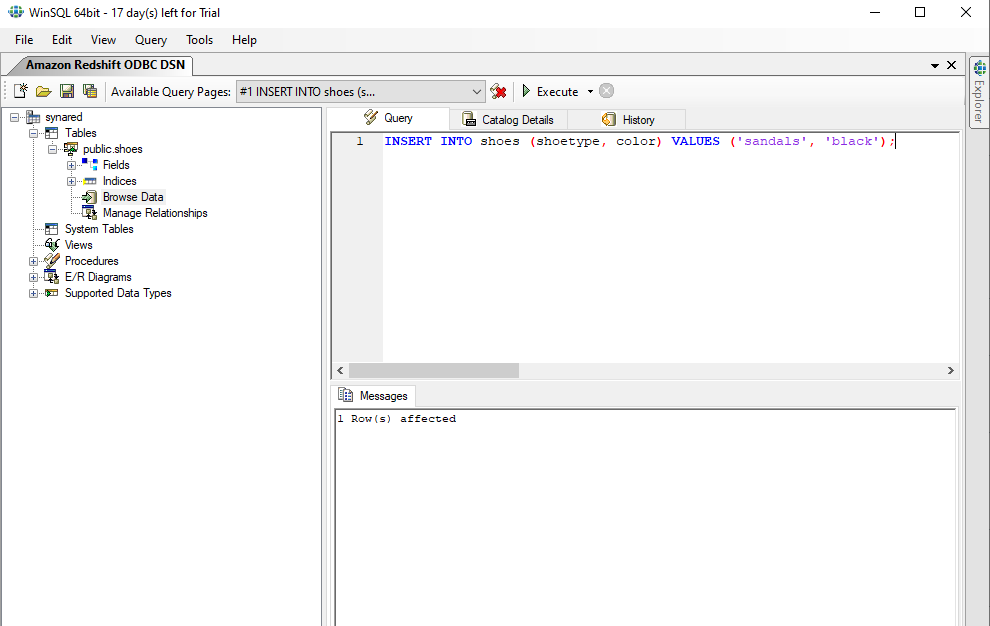
If I browse the data I can see that there is now a sandals object with the color black:
Using your ODBC query tool you can interact with Redshift directly as if you were doing so directly through the Query Editor in Redshift. The benefit is that you also get the entire suite of your chosen tool as well as a much more informative interface.
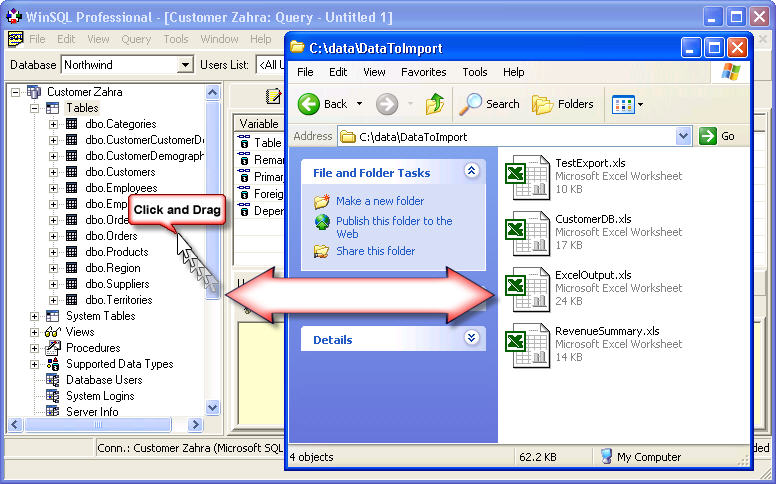
Importing Data from Excel
Once you are connected to your Redshift in WinSQL, you will be able to see all of your tables and data within WinSQL. To begin importing data directly from Microsoft Excel, simply drag and drop the .xlsx file directly into your Tables section as seen here: