Synametrics Technologies
Revolving around the core of technology
Document information
| Document ID: | 1484 |
|---|---|
| Subject: | Guide to running a SQL query and send the results via email to MS Excel or a text file |
| Creation date: | 9/2/10 12:13 PM |
| Last modified on: | 12/13/18 11:45 AM |
Running SQL queries & attach to email
Often users want to run SELECT statement(s) against a relational database and send the results as email attachments. This guide demonstrates the steps to accomplish this task.
Objectives
- Run a SELECT query against any relational database.
- Save the results to a local file that can be opened in MS Excel or any other text editor
- Email the saved file to any recipient on the Internet
|
NOTE: MS Excel is capable of opening .CSV files as if it were a native MS Excel file. .CSV files are plain text files containing comma-delimited data. Since .CSV files are more portable and smaller in size than .XLS files we recommend using this method over saving the data to an MS Excel file.
|
Steps
- Start WinSQL and connect to your database
- Write a SELECT statement in the query window and run it to ensure it works
- Next, click the Export results menu item. See below.
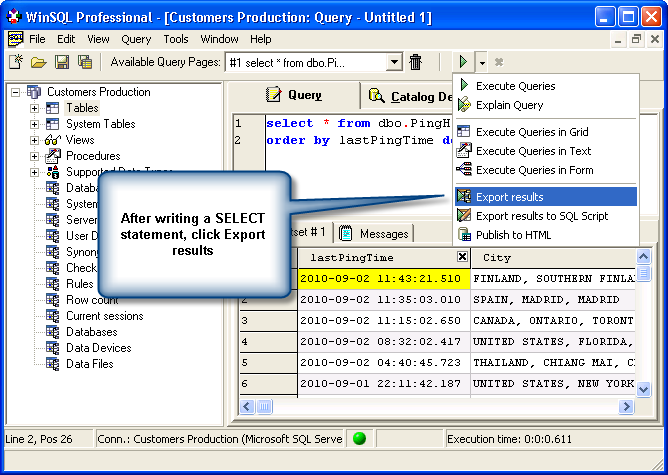
This will invoke the Export Wizard in WinSQL - Create a new template and click Next
- Select Export to an external text file on the next screen. See below.
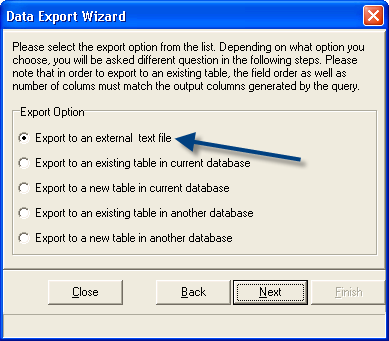
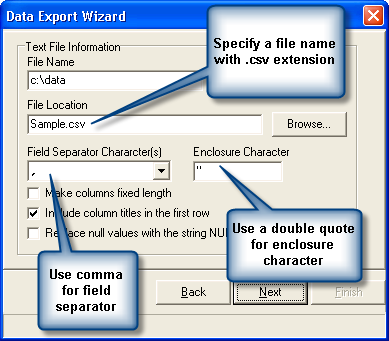
- Specify options to export a comma delimited file, with a .csv for the file extension. See below.
- Next, save the template file to the disk. See below.
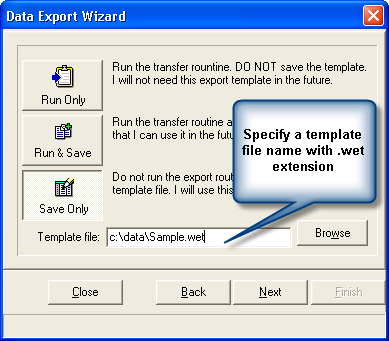
Then, click the Next button and finally Finish - So far you have defined a template file for your export. Now you need to schedule a task that will run this template periodically. To do this click Scheduler under the Tools menu.
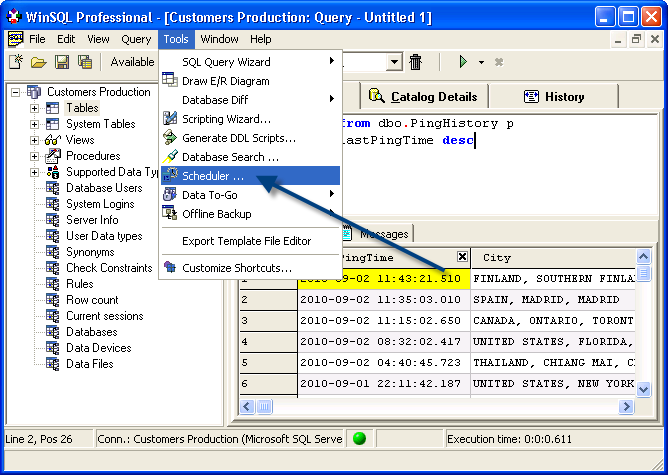
-
This opens up the scheduler wizard in WinSQL. Click Add New Task to add a new scheduling task.
-
Once a task is created, click the Modify Schedule button to schedule the task.
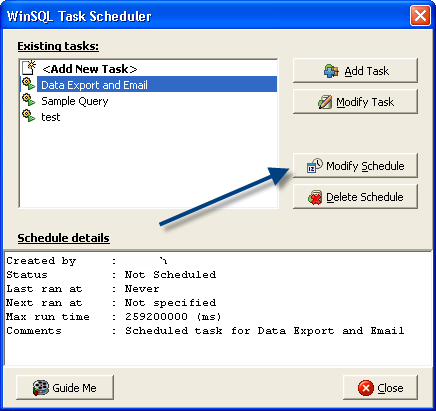
- That is it. When the task runs, it will query the database, save data to a .CSV file that will be attached to the generated email.
The recipient should be able to just double click the attached .CSV file to open data in MS Excel, provided his/her machine is configured to handle .CSV by MS Excel.
User comments
Posted by Diederik Schoof on 1/13/21 12:16 PM
Please add the option for ; (
semicolon) to the select options!
Add a comment to this document
Do you have a helpful tip related to this document that you'd like to share with other users?
Important: This area is reserved for useful tips. Therefore, do not post any questions here. Instead, use our public forums to post questions.
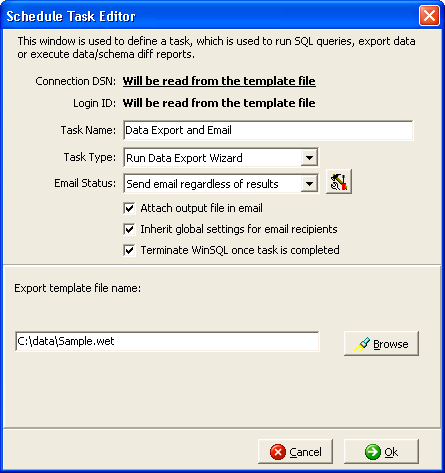
 button to configure email settings.