Synametrics Technologies
Revolving around the core of technology
Document information
| Document ID: | 1428 |
|---|---|
| Subject: | Seeding initial backups in Syncrify |
| Creation date: | 7/21/10 10:19 AM |
| Last modified on: | 11/12/18 12:44 PM |
Seeding initial backup
Consider a scenario where you have to backup large files (over 10 GB) to a remote machine over a network. Regardless of which transport mechanism you use (Syncrify, FTP or any other similar programs), transferring large amount of data across the network can take hours.
Often a faster approach is to copy the files to external USB drive, take it to the physical machine and copy it to the appropriate folder. Since Syncrify just copies the changes in a file, the next backup task won't transfer the entire data again and therefore, will run much faster.
This method is called initial seeding.
Steps for initial seeding
- The first step is to determine where files are located on the server. When you create users, you have to select a repository path, which becomes the root of every file stored for that user. The actual file location is a concatenation of
$RepositoryPath/UserEmail/ProfileName/ServerPath/Actual files
Here ProfileName and ServerPath are variables passed from Syncrify client. - One tip to find the actual location is to run a backup on a small file to see where it gets stored on the server.
- Once you have found the exact location on the server, you can copy files from your USB drive to this location, which will act as initial seeding.
- Optional Step: Once the files are copied manually to the server, open Syncrify Client on the client machine, load your desired profile and click Initialize Seeding under the Tools menu.
This step is optional and is only recommended if the last modified date of the source files are NOT retained during seeding OR the client and server are on a different time zone, By clicking Initialize Seeding under Tools menu, you can change the last modified date of every file on the server so that it matches with the client plus/minus GMT.
Using encryption when seeding
Encryption add an extra twist to seeding. When users decide to use encryption, every file residing on the server is encrypted but same files are on the client are not. Therefore, before taking your files to the server, you need to encrypt them on your local machine and then take those encrypted files to the server.Use the following steps to encrypt files before manually moving them over to the server machine.
- Copy necessary files to an external hard drive or a USB pen-drive.
- Run Syncrify client on that machine
- Click Encrypt/Decrypt Files... under the Tools menu
- Select the folder on your external/USB drive where you have copied the files. VERY IMPORTANT DO NOT encrypt the original files on your machine.
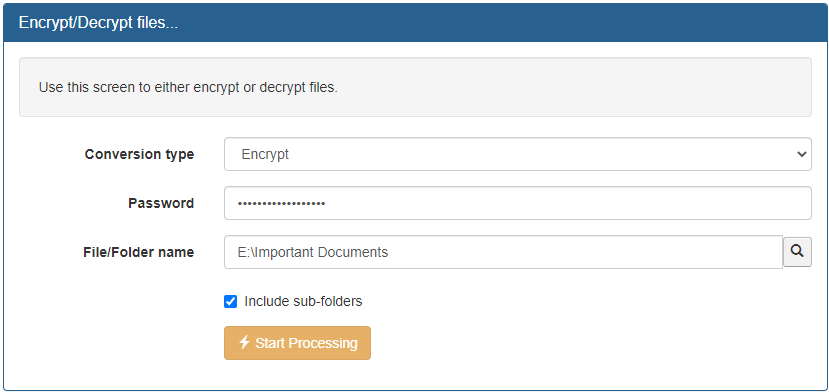
- Following the instructions on the screen to complete encryption
- Take the encrypted version of the files to the machine where Syncrify Server is running
Common problem and resolution
The most common problem that occurs during seeding is that files are NOT copied to the expected folder path. If Syncrify expects the seeded files in folder A but the actual files reside in folder B, Syncrify server won't know about the files and it will try to copy the entire file set when a backup is run.To ensure files are copied to the correct folder, try connecting from the web interface using the actual users login id and password. Click here for instructions if needed. If seeding is done correctly, you should be able to see the files you have just copied manually. If you don't see the files, that means they have been copied to the wrong folder.
Add a comment to this document
Do you have a helpful tip related to this document that you'd like to share with other users?
Important: This area is reserved for useful tips. Therefore, do not post any questions here. Instead, use our public forums to post questions.
