Synametrics Technologies
Revolving around the core of technology
Document information
| Document ID: | 1999 |
|---|---|
| Subject: | Integrating SynaMan With IIS 7 |
| Creation date: | 3/20/12 2:57 PM |
| Last modified on: | 11/8/18 10:53 AM |
Integrating SynaMan With IIS 7
Overview
In this short tutorial we're going to enable IIS 7 in Windows via the Control Panel, make a new site, create some ISAPI filters, a virtual directory, and point IIS 7 to the ISAPI redirect file we're about to download.
Preparing SynaMan for IIS 7
- First, download the necessary 32-bit files or 64-bit files
- Create a sub folder under C:\SynaMan called IISConnector
- Unzip the downloaded file and extract all files to c:\SynaMan\IISConnector
- Stop SynaMan if it is running.
- Download ajp.jar from here and save this file in the C:\SynaMan\lib folder.
Configuring SynaMan
- With SynaMan still stopped, navigate to the SynaMan installation directory. We are going to open a configuration file and add a line to allow IIS and SynaMan to work. The AppConfig.xml file is located here:
- %INSTALLATION_DIRECTORY\SynaMan\config
- Open AppConfig.xml in any text editor and add the following line:
<parameter name="ajpEnabled" type="4" value="true"></parameter>
Here is our example

Turn on the SynaMan service.
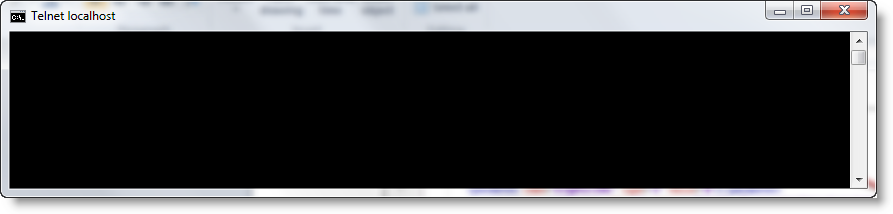
Test SynaMan on telnet
From a command prompt, use telnet to connect to localhost on port 6061 just as below.
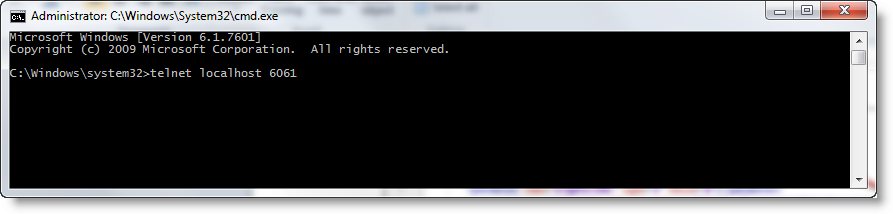
If you see a blank screen after connecting, this actually means everything is working properly.
Preparing Windows
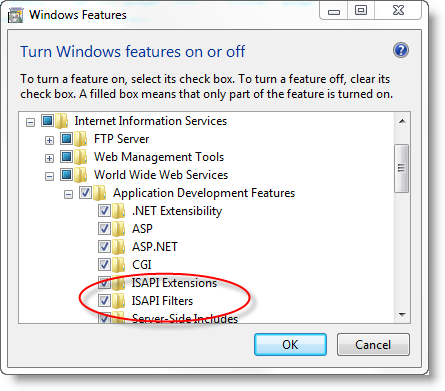
Turn on Windows 7 features via
- Start > Control Panel > Programs > Programs and Features > (Left hand column) Turn Windows features on or off.
IMPORTANT:
When enabling (IIS) Internet Information Services, expand out to the Application Development Features and enable the ISAPI Filters. To do this complete the following:
Internet Information Services > World Wide Web Services > ISAPI Filters
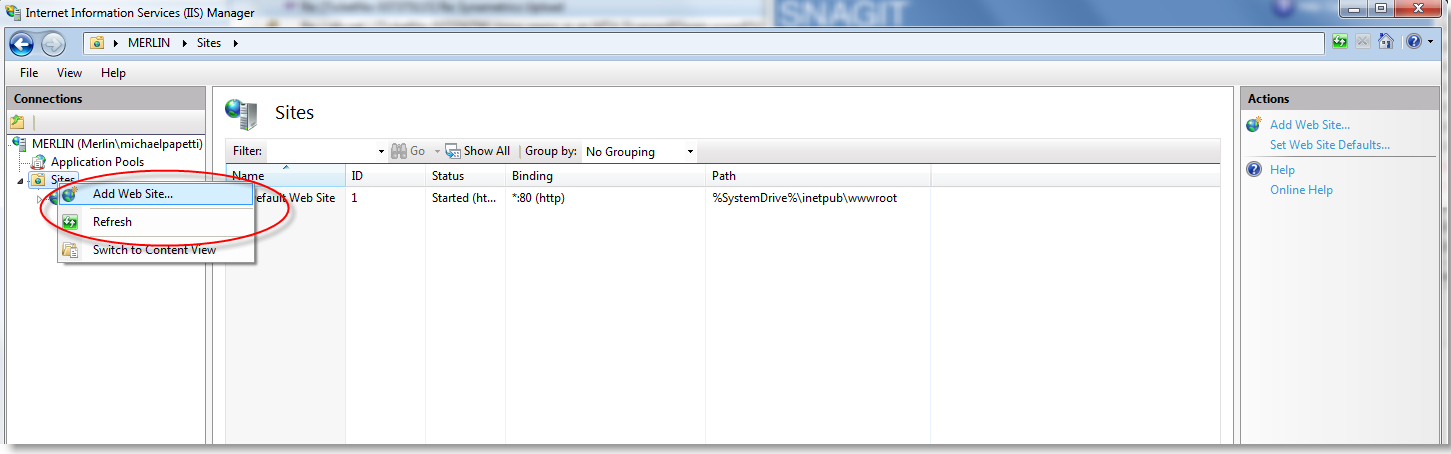
Start the IIS Manager and Create a Site
To manage IIS, open the Start Menu and enter "inetmgr" in the search bar and select it from the list. Next you will create a site by right clicking on the Sites folder as the image below shows.
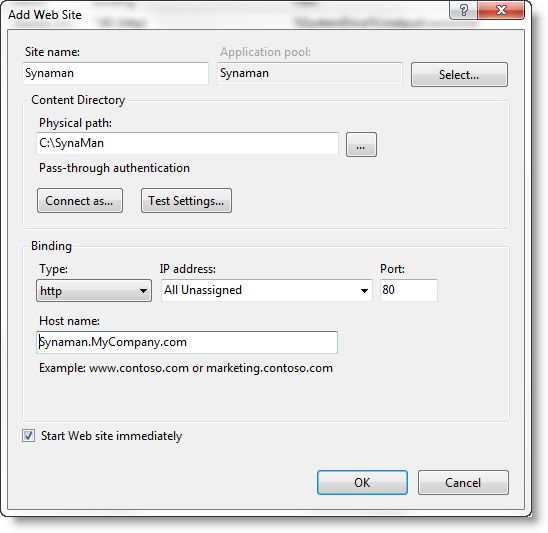
Enter the information below, substituting the host name suffix "MyCompany" with your own.
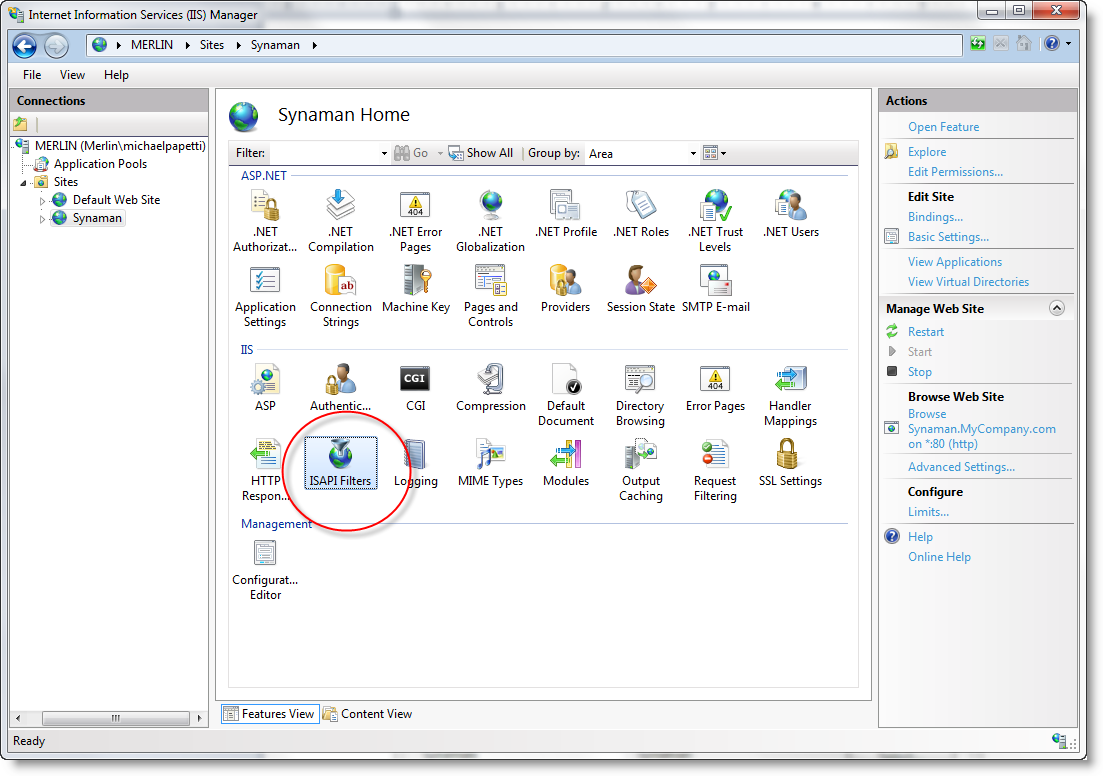
Adding an ISAPI Filter
Next you will add an ISAPI Filter for the SynaMan site. In features view choose ISAPI Filters and enter the following information:
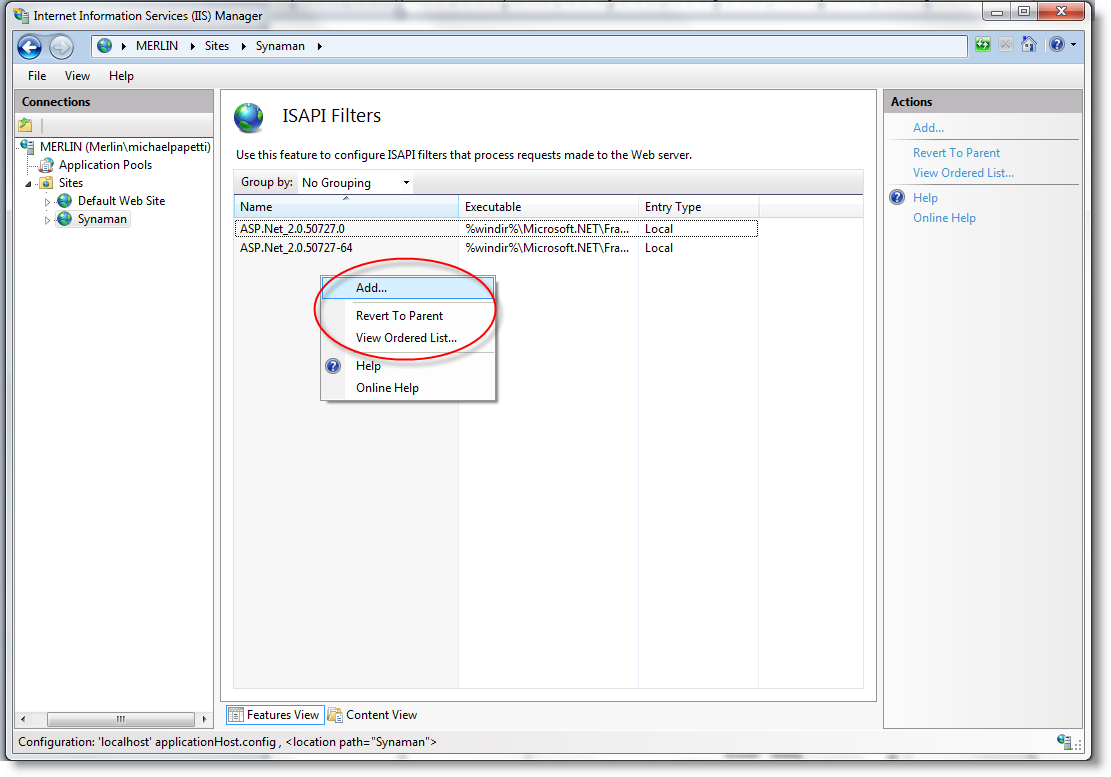
After you've selected the ISAPI Filters feature, right click to add a filter:
When Selecting the ISAP executable path, choose the isapi_redirect.dll file in the IIS Connector directory we had previously made in the SynaMan installation directory: %INSTALLATION_DIRECTORY\SynaMan\IISConnector\isapi_redirect.dll

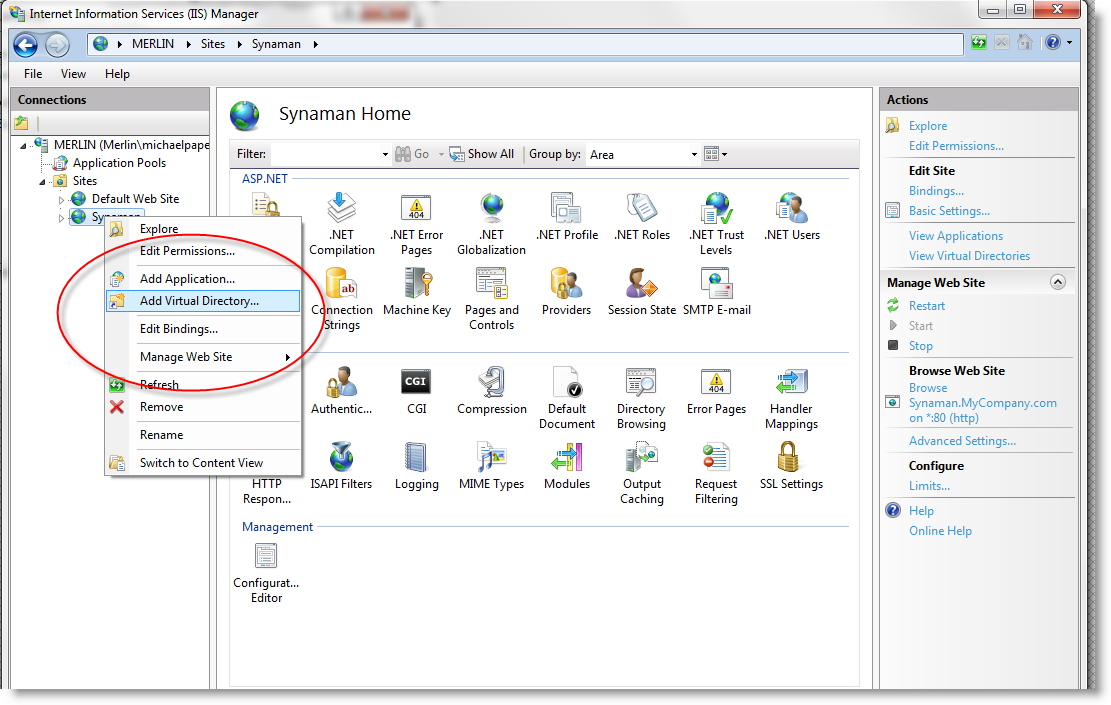
Adding a Virtual Directory
Next create a virtual directory for SynaMan by right clicking the SynaMan Website listing in the left hand pane. Then, choose Add Virtual Directory.
The physical path will also point to the IISConnector directory we have created in SynaMan's installation directory.

Next, we want to enable the isapi_redirect.dll in the handler mappings feature list so that IIS 7 knows to allow requests to be redirected to the ISAPI file.
In order to do that we're going to enable the execute handler from the site level.
Enabling Handler Mappings to Execute via ISAPI
While the site is selected choose "Handler Mappings" from the feature list.

Choose "Edit Feature Permissions" to make the site recognize that there is an ISAPI handler waiting for requests:
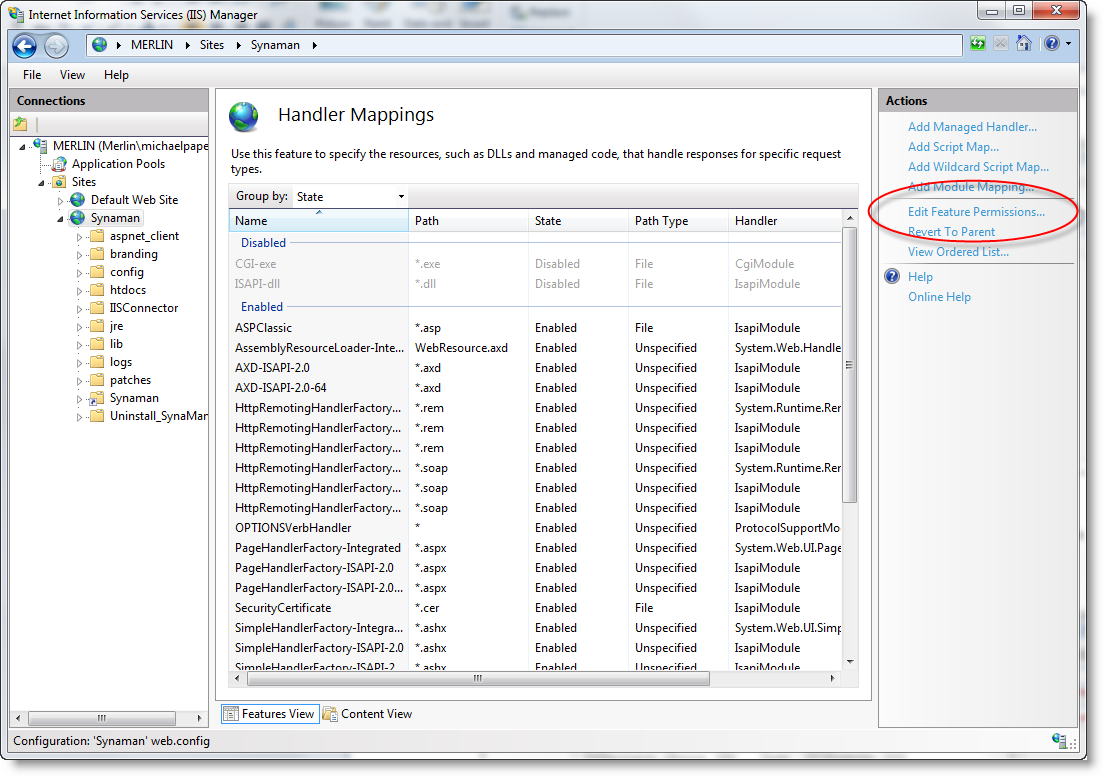
Enable the "Execute" option.

In the following screen the ISAPI DLL should now be visible.
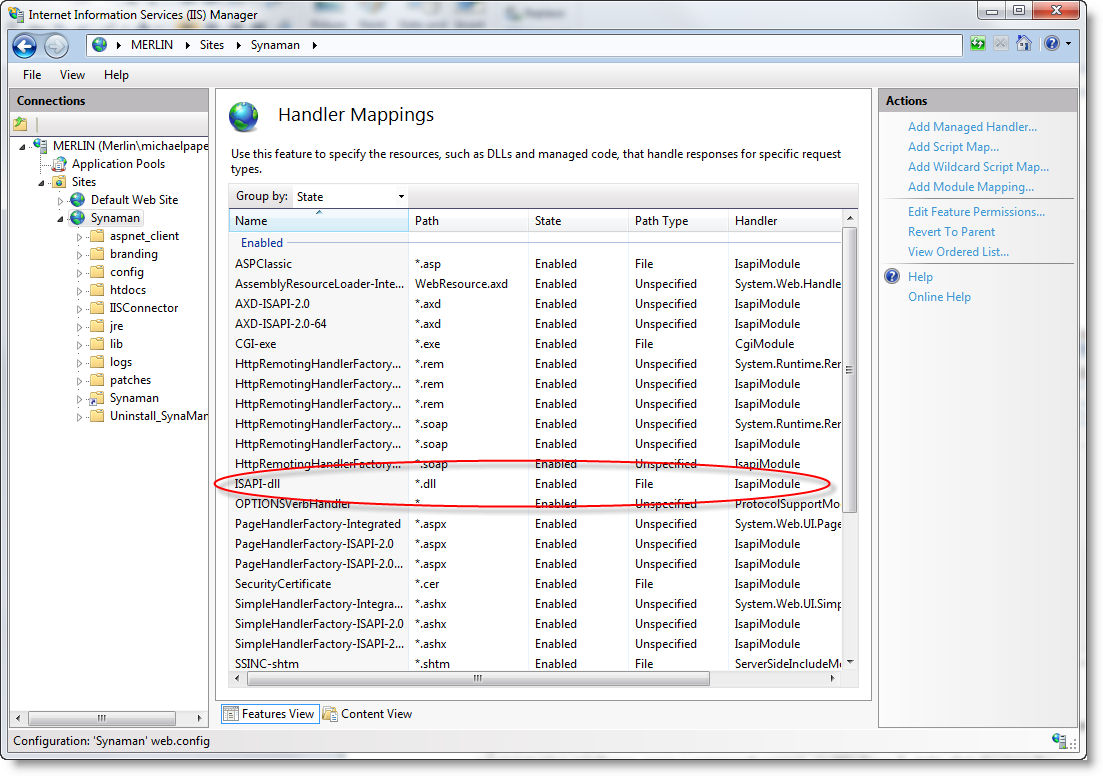
Once the ISAPI Handler is visible, we can now make the server aware of the ISAPI as a global setting. The following step replaces adding a web extension in IIS 6.
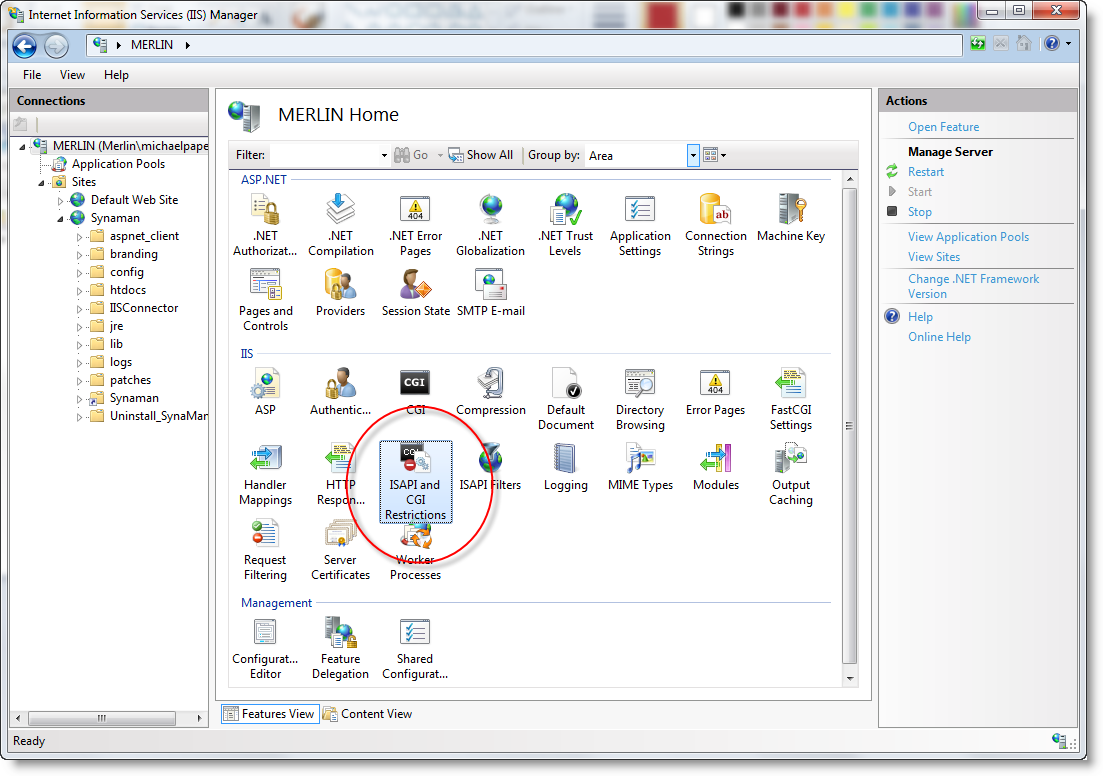
Adding an ISAPI/CGI Restriction (a.k.a web extension from IIS 6)
Select the server from the left hand connections pane and locate the ISAPI and CGI Restrictions feature.
Once selected, right-click and choose "add.." from the drop down:
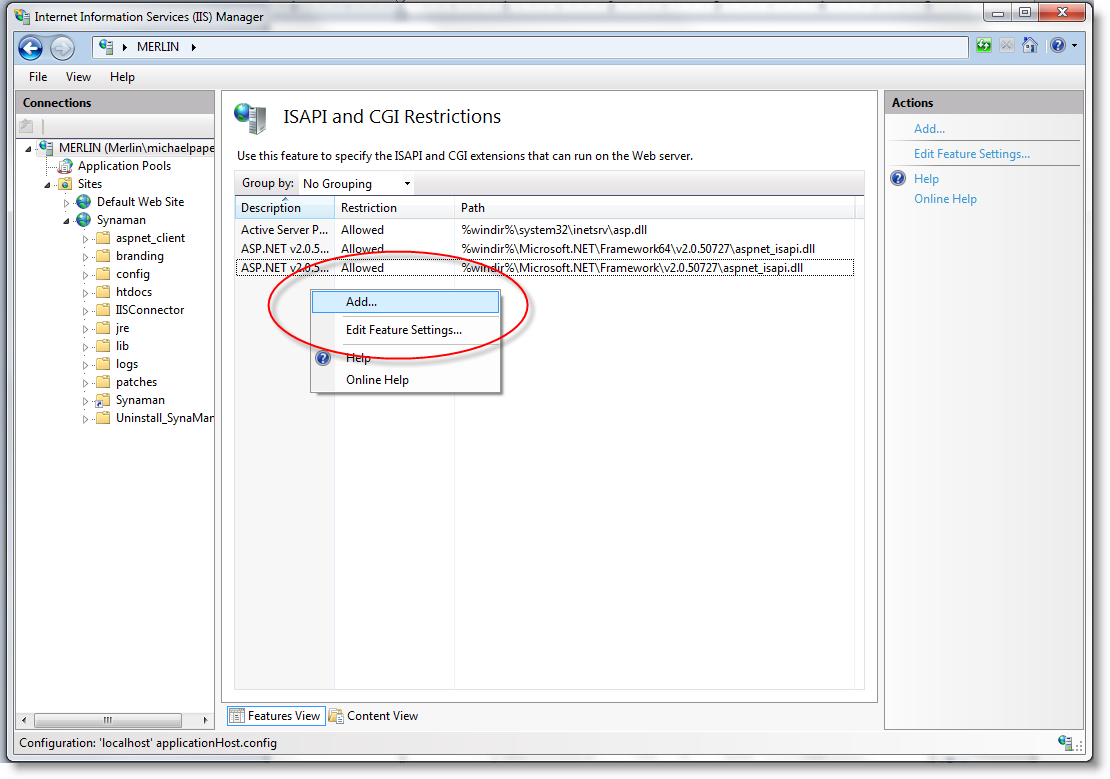
When choosing the ISAPI/CGI path, choose the isapi_redirect.dll file we previously placed in the %INSTALLATION_DIRECTORY\SynaMan\IISConnector directory
IMPORTANT:
Be sure to enable the "Allow extension path to execute" option for this restriction.

Simply restart the site via IIS Manager:
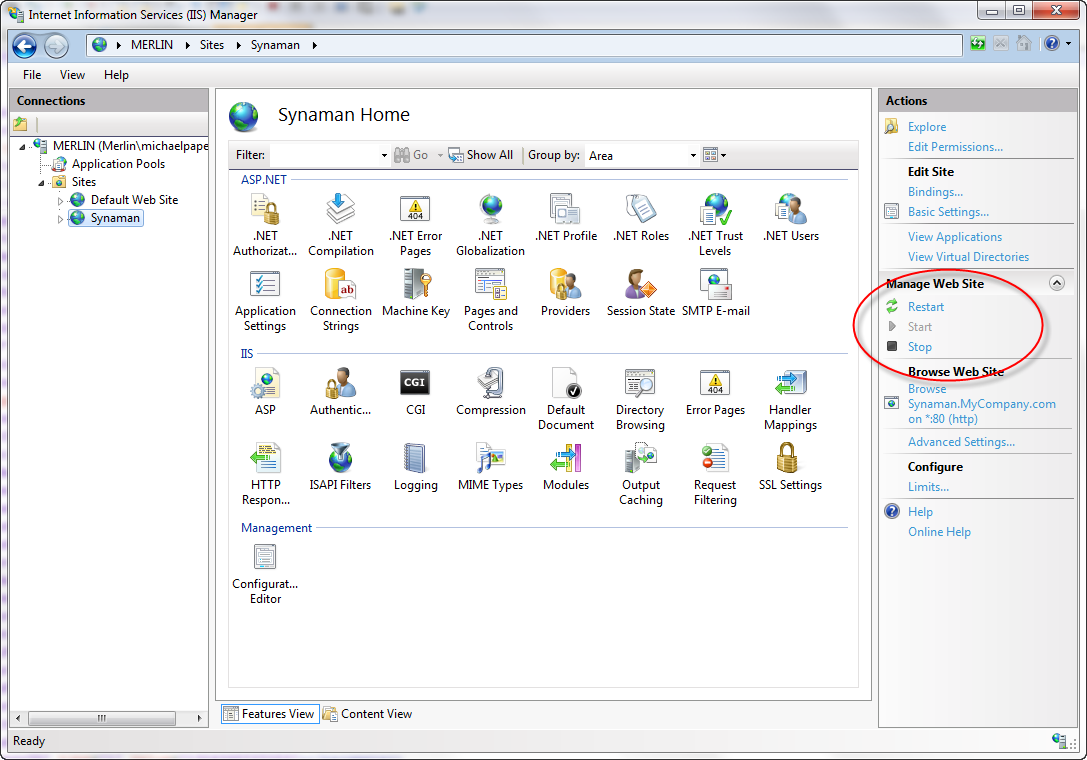
and SynaMan is now configured with IIS 7.
Size limitation
By default, IIS does not allow file uploads greater than 30 MB. Refer to this page to change this behavior.User comments
Posted by irfan on 11/7/16 10:02 AM
Posted by Brad on 1/2/17 9:38 AM
Add a comment to this document
Do you have a helpful tip related to this document that you'd like to share with other users?
