Synametrics Technologies
Revolving around the core of technology
MS Exchange Plugin
The MS Exchange Plugin allows users to backup mailboxes in Microsoft Exchange to a remote machine. This plugin has following requirements:- MS Exchange 2010 (SP3) or newer
- MS Exchange management shell is installed
- The Syncrify client must be running on the same machine where MS Exchange is running
- There must be enough free disk space on this machine to hold PST files.
Step 1
Create a share folder on the server and grant Exchange Trusted Subsystem read/write permission. In this example, we are using a share called ExchangePST that is referring to C:\ExchangePST folder. See the image on the right and click to enlarge.
This folder is used to store exported PST files from Exchange server.
Step 2
Next, you will need to grant a user, or group, the Mailbox Import Export role. Backups will run using this user's account. Follow the steps below to accomplish this task:
- Open Exchange Management Shell on the machine
- Type the following command.
New-ManagementRoleAssignment -Role "Mailbox Import Export" -User YourActiveDirectoryDomain\Administrator
Change the machine and user/group name appropriately in the above command.- Close Exchange Management Shell by typing the Exit command.
Step 3
Change the user account that will run backups using the following steps:
- Open Services from Control Panel
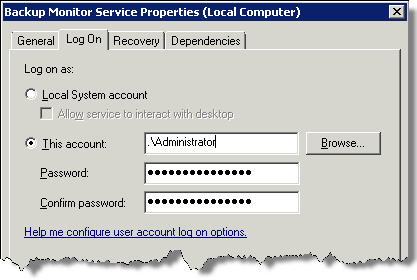
- Locate a service called Backup Monitoring Service, double click it to invoke the properties window.
- Click the Log On tab and switch the account to Administrator. See image below
Step 4
Now you are ready to configure Syncrify Client.
- Start the Syncrify client
- Select the Profile name node on the left and click the right mouse button. Then, select MS Exchange from plugin.
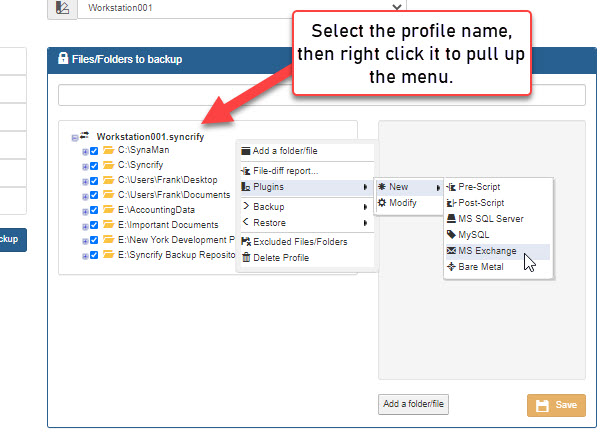
- This opens up the following window.
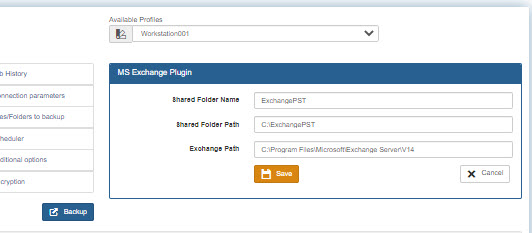
The following table contain field definitions for this window.
Shared Folder Name: Shared folder you created in Step 1 Shared Folder Path: Absolute path of this shared folder Exchange Path: Location where MS Exchange is installed. - Once the plugin is configured, run backup to confirm it is working
Restoring Files
Use the following steps to restore individual mailboxes.- Start the Syncrify Client and load the profile containing Exchange Plugin
- Select the MS Exchange node from the tree-view
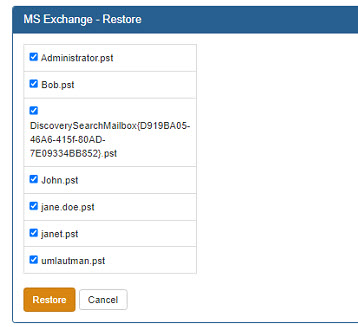
- Click the right mouse button and select Restore/Selected Folder
- Next, select the PST files you like to restore and click Restore. See image below.
Important!
Unintentional restores for MS Exchange can be dangerous. Therefore, the Exchange plugin is designed to ignore a profile restore. This means, Exchange mailboxes are NOT restored when a user click the button to restore entire profile.Troubleshooting problems
Syncrify executes some power scripts in the background before backing the mailboxes. Refer to logs/MSExchange.log file in the Data Folder if you run into problems executing this plugin.
